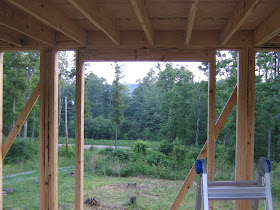
.  The first step in framing the infill walls is rough openings for all the windows. I'll pop in studs around them to fill out the space, either 16"o.c. or 24"o.c., depending on the size of the gap. Since the frame is post and beam the walls are non-load bearing, and there is no real weight on either the doors or windows. So I don't need large headers over them. A doubled top plate will suffice.
Patty's been buying windows and bringing them up every time she visits. Once we've decided on a general layout for the interior of the cabin, we place the windows. The above rough opening is for a large vinyl clad double-crank window that will go in the kitchen.
Below is a rough opening for a 3x4 window that overlooks the garden:
 We've got all the windows for around $80 to $90 a piece from a builder's surplus store in Atlanta. They are all new, vinyl, most open, they're doubled-glazed, argon filled, and some have low e glass. So they're modern efficient windows. I personally prefer wood casement windows that crank open . . . but they're hard to find at a reasonable price, so in the future I'll build my own. This project is about speed - getting it done.
We tried several salvage yards for windows and found the windows were either junk, inefficient, ugly, inoperable, or overpriced . . . used windows are a little problematic when you're going for a thermally efficient building. The modern window is pretty hi-tech and expensive. We've gone with a lot of windows for this particular building because the footprint is small . . . we don't want it to feel like a shack. There are great views in virtually every direction, and we wanted to take advantage of that. We also wanted the building to have a lot of natural light, crossbreezes and ventilation, as well as some passive solar heating when it's cold out.
Here are the kitchen window rough openings in:
 This particular wall is southeast-facing so it has a lot of glazing. The opening on the right, though it appears small next to the crank window's on the left, is actually 3'x3'. These openings start at 3.5' in height - a kitchen counter will go in at 3' beneath them.
Here's the rough opening for the french doors that will go out to the addition:

I go with a small header here to fill the space. We actually find a deal on a set of exterior french doors afterwards, $330, free delivery, but I have to bust out this frame and expand the opening to get them to fit.
.
Once the wall framing is finished on the lower story, I begin putting up the sheathing. I use standard OSB 7/16ths wall sheathing. This gives the building great lateral strength, as well as instant walls, a weather barrier.
I first try cutting the rough openings out of the sheathing before I put it up, but quickly move to the standard method of putting up the sheathing whole, fastening it, then cutting out the window gaps. For this I use a reciprocating saw . . . crude, but quick work. The sheathing is put in vertically, as all my carpentry books say that is the best way to run it for maximum lateral strength.
.Here's looking toward the NW wall, what will be the bathroom and possibly stove area beneath the loft:

Here the sheathing is finished throughout the lower story, and the place really feels like shelter:

I use 8d ringshank nails to fasten the sheathing - they have a good hold, and the nails won't migrate out. I'd bought a case of these nails at the local hardware store - they happened to be galvanized, and I thought it wouldn't make any difference. Was I wrong! The galvanization process severely weakens the nail, and unless I hit each nail with a perfect stroke it lays right over. Putting up sheathing with hand-driven nails is a lot of work, and hard on your arm. In my situation it is exceptionally tedious, finding where all the studs are in the custom framed walls.
Here's Patty sitting beside all our windows in what will be the kitchen. Though she looks serious, I bet she's reading a kid book:
.

Here the framing and sheathing has moved on to the upper story:
.

I'm using one of those 3 in 1 ladders, which so far is great - very stable:

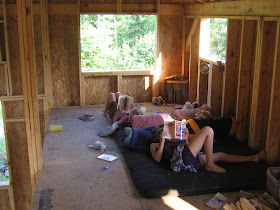
Here the loft walls are up, and the girls have moved in to their future bedroom:

Our first night living in the cabin is truly awesome. There's something about moving in to your own place that you've built by hand that is a very good feeling. But moths still come in through the window holes for the lights as we read at night. And wasps are still thinking about nesting in the rafters.
Here's the view out our 3x4 bedroom window, overlooking the garden:

And this view is out the side of our bedroom towards the valley . . . the window will be a 2x3 slider:

Here the entire building is sheathed:
Remember when there was nothing there?! It's sprouted up like a mushroom.
.
This is the rear of the building, the northeast side, facing the garden:
The 3 central vertical windows are the only ones that are fixed glass - they were about $40 a piece. They're the first windows we bought, and were originally going to be the clerestory windows on the south side. But they're so small . . . and they don't open. We thought sliders would be a better choice for the bedrooms. So I went for a 'triptych' look with them instead, going for the big view overlooking the property.
.
Here is the southeast side, facing the driveway, and woods, and the blueberry grove:
.

Here is the front of the building, the southwest side, facing the road, and our little yard with the autumn olives:

It looks a little weird and out of proportion, but that's because the upper windows are 2x3 sliders that will serve as clerestory windows. The large addition will cover everything below - the french door opening will connect them. And as far as the pier foundation . . . it will be concealed with a lattice.
Here is the northwest side, facing the power pole, and a very lush valley, which would be a good place for planting some fruit trees, especially plums:

The next step is the housewrap. I found I could save $50 by going with a cheaper homewrap than Tyvek (every builder told me it was all the same stuff - you were just paying a premium for the DuPont name).
The wrap is heavy and 9' tall. If I had another adult with me it would have been nothing. But alone it was somewhat complicated. The lower story of course was no big deal:

It was the upper story that was rather challenging. I had to unroll some wrap and clamp the tube of it to a window opening, fasten the wrap quick with a tackhammer, then pop in several buttoncaps, and move on to the next stretch, unrolling the wrap and clamping it to the next window. I had a few wrinkles in the end, but otherwise it went okay.
Wrap is reported to be an important part of the thermal performance of the building - it's like a breathable jacket (i.e. GoreTex) around the structure, keeping out cold yet allowing moisture to exit.
Here's a shot of the kitchen side wrapped:
.

There's a special tape for the seams, but it's very expensive - $12 for a small roll. I use it for all the wrap on the wrap seams (or wrap on wrap), but for the bottom and top, where the wrap is on wood, I use a red duct tape, and staple it with the tackhammer to make sure it stays down.
Here's the rear of the building:
I ran out of wrap at the end, and had to put in a few extra pieces with large overlaps to cover the gaps.
.
And the front, later to be mostly covered with the addition:
We still plan on bricking these walls to the right and left of the french doors to store heat in the sunroom. The weight will be distributed right across the piers.
Next step - doors and windows.
.

 There are ripe blueberries everywhere off the trail, and the area is rather fascinating upland forest.
 Here are the falls, pretty modest actually, a little chute of rapids:
 We're not overall that impressed with the bottomlands along the river and the trail's sort of boring. But the Big South Fork is a huge area - we'll try different trails.
 Patty finishes up another pair of moccasins, the colors and design ordered by the customer:
 We've made moccasins for over 10 years, and continue to ship moccasins all over the world. It's become slightly more lucrative than it was in the past, as we've raised prices, but each pair of fully beaded still takes a month to make. It's hard to put a reasonable price on that.
  The area beneath our bedroom loft, where the kids are sleeping for the moment. This area will ultimately be the bathroom:
 Here I've put in a temporary kitchen counter where the kitchen will go. It's made from scrap boards and 2 sheets of OSB:
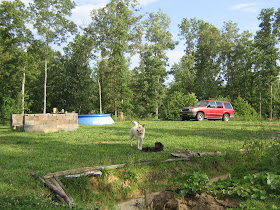
 Here is Annie, the stray dog who showed up in May and who has no plans of moving on:
 A lot of people drop stray dogs off back here, thinking they'll 'live off the land' and be 'free'. Dogs are not cats. These dogs can't take care of themselves. They'll either go begging from door to door to be taken in, or bond with a feral pack and raid your garbage. Or starve to death.
 We visit Atlanta for the 4th of July and stay with my parents in Roswell. We actually look at a few homes, as Patty's convinced it's a smart thing to buy a fixer-upper in Atlanta, have a place to stay we own when we're there making money, and ultimately turn it over and with the profit pay off our land in Tennesee, and truly semi-retire. Of course I feel a great deal of ambivalence about this and hate Atlanta - any big city for that matter. It's not where I wish to live or raise a family, even though we've both got guaranteed income there and family.
 Once this is done, we are truly totally out of money, so I begin digging out behind the barn. Remember last year when I dug out the 10' aisle beside the barn to give me fill to build up the driveway? Well now the back needs done too, so the land is sloping down and away from the building at all points. This 10' swathe is nearly 50' long, and tons of dirt need removed because the hillside is higher here. It is an incredible workout with a pick and shovel, and sometimes I'm working all day in the rain. I dump the dirt at the edge of our clearing, and create a 100 yard planting berm between the woods and the clearing.


