This is what we have to work with:
There are 16 treated posts, all exactly 12 feet apart. The four posts along the outside left, and the outside right, are 4 x 4's. Many show considerable warping. The two rows of posts on the inside are 6 x 6's. They're still solid and immovable. The structure overall is about 12' high.
The boards across the top are called eave girts in pole construction. They look pretty level and are possibly worth keeping. All the diagonal boards and ground level boards are temporary bracing. Everything is green wood. So the sizes are exactly either 1 x or 2 x, there's no shrinkage from planing and kiln drying that you get from factory boards.
Unfortunately the site was not graded. The slope down and to the right is almost thirty inches. There are several options here for having a level ground floor. One is to go in and grade it, with a retaining wall at the low end, to hold the dirt back. Maybe split the difference with the grade. Go up 15 inches in the front right corner, and dig down 15 inches in the back left.
Another option is to build a raised wood floor off the posts. But I want to be able to bring equipment in, possibly a vehicle, maybe animals, so this won't work.
I could also have fill delivered to level up the low area of the barn, and then I wouldn't have to dig down in the back and unearth the posts. But I don't think I want the retaining wall that high across the front. I want a small mounded driveway in the front that we can walk or drive right in.
I'm leaning towards splitting the difference, and establishing a grade mid-height between the back left post, and front right.
My plan for the barn is to leave the ground floor uninsulated, and make it a workshop, maybe have small animals, like goats, or something rustic, with pavers down for the floor. The upper floor will be insulated and made into an apartment, with decks off the front and back. The barn is 36' x 36', so this will give us a 1300 sq ft apartment upstairs, which is far larger than any city apartment we've ever been in, so it's plenty of room. I'll do a gambrel roof also to maximize our loft space. Here's a sketch of what I'm hoping to build:
 I've also drawn a sketch of my overall vision for the property. It's shaped a lot like the state of Nevada. The dirt road goes along the boundary at the front, or south, the back is woods, and the upper portion is cleared. This is how I think it should be devloped:
The sketch is too large to scan, so this is a photo. Basically the garden is in the upper center, the barn is up and to the right of it, or east, the passive solar homesite is up and to the left of it. The home is on a slope facing exactly south. The creek flows along the right side, or east. The front of the property is wooded. We want to plant a lot of blueberry, and fruit trees, and have a huge productive garden. The goal is not only to feed ourselves, but maybe grow enough to sell to meet other expenses.
When I was digging out the burn site, I noticed footers had been poured everywhere as a base for the piers of concrete blocks. There's an actual maze of concrete footers that are wide enough to be paths through the garden. But it's going to take a lot more digging to expose them completely.
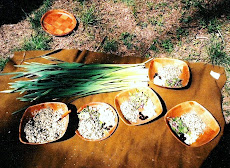
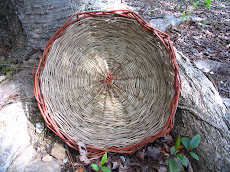
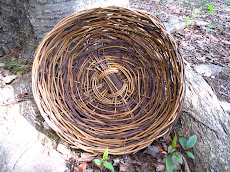
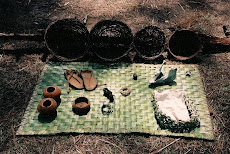
Besides research and planning, my wife and I collaborate on a large beading project as a Christmas gift for my mother. We handstitch a beaded table runner that's about four feet across. It takes us almost two months to finish, and I can't even imagine the number of beads. But we've been making beaded moccasins for years now, and it was nice to have a much bigger canvas to work on. Here are photos of the finished product:


 Towards the end of winter I take a job at my father's factory (he manufactures envelopes). I work at the warehouse, unload trucks, move pallets around, etc. It's a six hour shift for $75 cash, which isn't fabulous, but isn't terrible either. But once it gets monotonous and I feel I'm not learning anything, and it has no relevance to homesteading, I leave and try building a patio.
We start worm bin composting. My wife orders a pound of special red worms online, which costs about $25, and I make the bin. I take a ten gallon plastic tub, drill holes in it, lay down a metal screen inside on the bottom, and fill it about 2/3's up with peat moss. Then in go the worms, and you cover it with a lid, that also has holes. Unlike earthworms, red worms love fruit, especially melon. But they'll eat lots of vegetable scraps. Their favorite food seems to be melon rinds placed upside down so they can feed in the dark. I guess they love the sugar. Here's a few photos:
My daughters and I volunteer one day at the local organic farm. It's a big operation, with several acres intensively developed. The girls work on labels, while I learn how to make potting soil for seedlings, transplant tomato seedlings into larger pots, and we all go out to watch them harvest honey. We each leave with a fresh comb loaded with honey. It's a great experience, their greenhouse is a factory for seedlings, they make it look so easy.
We'd ordered about $130 worth of organic seeds from Seeds of Change. I was having trouble finding seedling flats, like they had at the farm. I was also feeling overwhelmed by how much we had going on and to build and considering not even bothering with seedlings. I'd decided to just plant the seeds directly in the ground once I got up there. I had no place anyway to transport seedlings in the loaded car.
But on a walk up through the woods to go shopping, I came across a whole bunch of discarded large black plastic pots. Like forty of them, half buried and some covered in poison ivy. It was kind of a sign for me, and I decided to dig them up and take them home. I cut them down with scissors so they were only about 4" high. I got bags of composted manure, and topsoil, and split it 50/50 for the pots. The worms also supplied a lot of mucky compost, that once I dried out on newspaper, it turned crumbly and fertile just like any compost, if not better. I used this also, and planted the seeds. I set them on the window sill every day. But our windows in the apartment didn't get all that much sun. So I took the 24 heavy pots, two at a time, down to the car and set them up on the roof. I made sure they had plenty of water so they didn't bake. Then those seedlings really took off. The beans would grow almost a centimeter a day. I'd developed a strong connection to these plants, and it was the highlight of my day to see them thrive. We were always checking to see who'd sprouted next, or who'd unfurled their first leaf. We're now ready for Tennessee.


























.jpg)

.jpg)

.jpg)




.jpg)
.jpg)

.jpg)
.jpg)
.jpg)
.jpg)





No comments:
Post a Comment