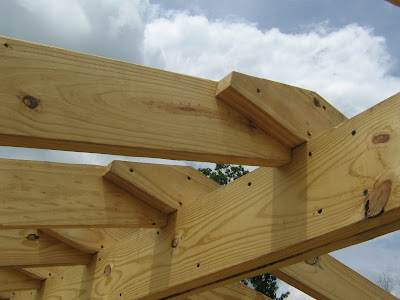
The rafters take several days to put in, and are the most tedious step. I could have saved myself a ton of time by cutting them all the same and just popping them in, regardless of how well they fit. But instead I make precision custom cuts for each rafter, so they will fit exactly in place. There are four precision cuts for each rafter. The plumb cut at the eaves, the 2 birdsmouth cuts where the rafter will sit on the lower and upper ridge beams, and finally the 'lop' cut at the top where the ends of the rafters go beyond the opposing rafter. Instead of a plumb cut at the top [peak], I overlap the rafters and join them together with clamps and screws.
Why go to all this work? Mainly a design issue. Because of the importance of open space and headroom in the upper story of the building, I could not put in collar ties except the two at the outside. Collar ties keep the rafters from flattening out. So what I did was to double seat the rafters on both ridge beams, and join each pair together at the top. This should create a connection so rigid that the rafters will not move.
To get my custom cut I propped the board up on the ridge beams, hold it in place with bungee cords (clamps, if it really won't stay put - but usually a tight cord does the job), then mark my lines. Each rafter has the same measurement mark of where it should be positioned on the upper ridge beam. Once I get the mark where it needs to be, I strap on bungee cords tightly at both ridge beams. I use a ruler to mark the location for the 2 birdsmouth cuts. I simply lay the ruler flush against the side of the ridge beam, and continue on with the line up . . . then lay the ruler flush across the top of the ridge beam, and continue the line on across.
I make most of the cuts with a circular saw, then finish each notch with a jigsaw [It makes no sense to me the conventional practice of overcutting with the circular saw to get out a notch. Why weaken an already stressed point in the rafter, simply for the sake of speed?].
After I've cut out both notches, I check the fit. Usually it's good:
 Once in a while I have to retrim and cut out a little more. But the rafters sit up there squarely and don't budge, before I even fasten - this is what I'm looking for.
I next make the plumb cut at the tail - something I should not have done. It's much better to put in all the rafters, then run a line where you want your plumb cuts, and do them all together. At the time I thought there was no way I wanted to make all these cuts high up on a ladder. But actually I could have made most of them reaching out from the loft. I would have gotten a much better line for my fascia boards if I had done this.
The rafter is then fastened in place with predrilling and toenailing [with screws]. I use clamps to get the board upright and to hold it in place while I fasten.
The next rafter I put in is on the opposite side so I can join them together. Once both in the pair are in I can mark where they need lopped at the peak to be flush. Here I'm clamping and fastening them:
 This is a finished pair:
 Here several are in:
 It took 2 full days to get to this point:
 The last rafters go in where there is no loft floor, so everything on one side is done either standing on braces or a ladder - much more difficult.
 You can see the knee braces that went in just before the rafters to stabilize the post/beam connection at the top.
 Another one, from a different angle:
 Here all of the inside rafters are done. Only the barge and possibly fly rafters need to go in beyond the walls - I haven't yet figured out what the overhang is going to be at the gable end:
 The metal roofing comes in 3' wide sheets, so I'm ordering enough for a 27' wide roof. The building is 25' wide. My ridge beams are 26' long. Originally the beams were only going to be 25' - but considering the dimensions of the wood I'd used added up to 26', I thought why shorten it? It'll help support the rafters beyond the building. The problem is, I should have made the beams a little longer, at least 26.5', so I wouldn't need to have rafters sticking out beyond the beams. What I'll have to end up doing is doubling up the rafters at the end, maybe even adding a little blocking, so that the edges of the metal roof aren't sticking out too far unsupported past the framing.
.
 A shot from below:
.
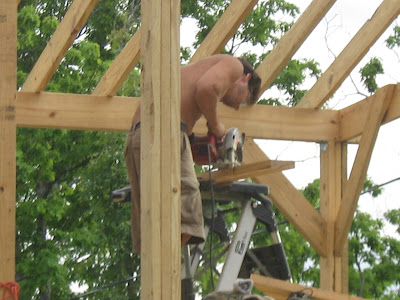
 Me working again:
 Here below you can see, especially if you click on the picture and blow it up, where I've doubled the outside rafters to push out the framing a little further to support the roof. The inside pair of rafters are run flush and butted at the peak with plumb cuts. The outside pair overlap the butt joint with a custom fit. I actually had to create a template to be able to make these cuts for a good fit.
































.jpg)

.jpg)



.jpg)




.jpg)
.jpg)
.jpg)
.jpg)

.jpg)
.jpg)











No comments:
Post a Comment