
Pier foundations are very common on cabins, outbuildings, and smaller homes, and are ideal for a number of reasons:
-The site does not have to be previously graded.
-There is less overall foundation work when doing piers . . . less cost, less labor.
-The building is elevated above the ground, and so the framing remains dry, especially when the area beneath the building is left open via a lattice, rather than permanently enclosed [think crawlspace].
-Plumbing and electrical can be put in after the shell of the building is up, and are easily accessed and altered at any time - a great help for amateur builders, who are usually winging it, and building as money comes in.
Two websites were key in the design and layout of my piers. They are BUILDING A CONCRETE FOOTING FOR A POST OR DECK, and AN EASY TO BUILD POST AND BEAM FOUNDATION. I did a lot of research elsewhere, but these two articles I specifically printed out and took with me up to Tennessee. And it was following these foundation designs more than anything that started me building a more conventional post and beam cabin rather than straw bale.
If I were following my original straw bale design I'd ironed out over the winter, all I needed was minimal piers (we're talking sauna tubes) for the posts to hold up my roof. Between the post piers would go the wide perimeter rubble trench foundation which would take the weight of my heavy straw bale walls.
But once I went down the path of building huge 16"x16" piers, all 6' apart, I began to realize that if I'd just stay with lightweight stick-framing, this was all the foundation I'd need. The thought of continuing more foundation work after I'd gone through the arduous labor of building 12 piers (the digging of a huge perimeter trench and infilling of gravel) was not a pleasant one. This project was about speed, low-cost, simplicity . . . it wasn't about reinventing the wheel. For someone with no prior building experience, just a little stick-framed cabin was challenge enough (of course I complicated everything by going post and beam - obsessed with keeping all of the weight directly on the piers - I do everything the hard way).
And as a sidenote on strawbale - I couldn't find it anywhere locally for a decent price. It rained nearly every day through the spring so keeping it dry would have been problematic. The only bales I could get readily in abundance were from Lowe's, and the quality was so poor they could never have been used for building. They were half as dense as the year before, a complete rip-off [and $4.50 a bale].
When the cabin and barn are done, I do intend to use alternative building techniques for the passive solar home. But I think the best candidate so far is dirt rather than straw. Our Tennessee soil is so clayey, that my excavated dirt from the footer holes cured into rock in the intense sun in a matter of days. I think if we added sand to it and found the ideal ratio, we could have some killer adobe, or use rammed earth or earthbags, some more monolithic technique. That is a building that would truly be low-cost and endure.
On top of the footers covered in my last post, went the concrete block:
 I used mortar between the courses where I needed extra height for the pier - skipped it where it didn't. I kind of miscalculated here. I didn't realize the first course of block goes down in a full inch of mortar, I figured it would be a standard 3/8" joint. So there were a few blocks I had to trim down with the circular saw to keep the pier from getting too high. Other than that, everything went smoothly.
 I then backfilled it with earth so water drains away from it, and doesn't pool around it:
 Here's a form removed . . . a true rig-job:
 I fill up 5 doubled 30 gallon bags - that's all the room we've got:
 We buy some apple trees from a local nursery. We get a Rome, a Grimes, and a Granny Smith. The Granny Smith is covered in flowers, and the Rome even has little apples! And the trees are tall and only $10 (online they're so much more expensive, and shipped bare-root).
 The girls have a lot done on their doll village . . . a post office, theater, school, a salon I think:
 It's Easter and we have a real Easter egg hunt. Patty's brought all kinds of sweets which we stuff in colored plastic eggs, then hide out in the grass.
 Here they're out looking for eggs . . . a perfect spring day:
 The harvest:
 Frozen Head State Park is about a half hour away from us, and we take a trip over for hot showers. Remember Frozen Head from last year, the place we climbed 4 miles to the top and found a spring and all the cherries and wild apples? Well the trailhead has a small building with free hot showers, truly incredible. And they are very well kept:
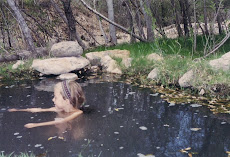
 It's such a luxury to bathe in hot water . . . so much better than the cold pool.
Patty and the girls are working on getting the garden going, tilling and planting lots of seeds. Patty has sown an entire bed with mammoth sunflowers:

 My book on Humanure emphasizes over and over the need for thermaphyllic bacteria in the composting process, which needs hot temps to exist. Try putting your hand into the middle of a pile of cut grass after a few hours - it's almost on fire!
 The low piers are done, and exactly in line:























.jpg)

.jpg)

.jpg)




.jpg)
.jpg)
.jpg)
.jpg)
.jpg)
.jpg)













1 comment:
Its interesting Information share,This is exactly cold content and additionally i love to read this approach content. your blog is normally terrific while you experience wonderful office personnel into your web page. excellent stating continue.
Home owner Services
Post a Comment