.

The first step in hanging the joists was figuring out where to put them. Rachael and I spent almost an entire day with the laser level, shooting level and marking it on all the posts, then measuring up. Because all the 2x10 boards that were used for the beams were crowned (bowed slightly with the arch up) I wasn't dealing with straight horizontal beams. We're talking fractions of an inch here, not inches, but I did need to decide what exact elevation for the floor would work best with the beams I had up. I didn't want some hangers partly below a beam, or a joist rising too high above one.
Ultimately I decided to go with a higher elevation for the floor, rather than go for an average. I knew I didn't want a joist hanging below a beam anywhere, and where the joists rested above a beam, I could build the beam up with a little plywood, which would actually strengthen it. Wherever a beam arched slightly above the joists, I could shave it with a planer.
So once I decided on the spot, I went around marking it. Since I couldn't really shoot and mark the mid-beams, because they had no studs, I would have to use a 4' level and hang the joists level with the 4x10 doubled joists.
All of this work was done before I put up the 4x10 doubled joists for the roof. The whole floor would be hung at the level they were at.
A 12 foot 2x10 is heavy. Especially when you've got to put it in 12 feet above you. And I had 47 to put up. So I had to formulate some kind of technique for getting them up fast and easy alone. After wrestling with the first few joists, and spending 90 minutes getting each one in, I got a certain series of steps down which I mechanically followed and cut the time to about 60 minutes.
Here are the steps in order:
Step 1:
Mark the spots for the hangers. I usually did this step in mass, measuring a 12' section at a time. I stretched out my tape 12 feet along the beam, then went marking the spot every two feet (as my joists are going in 24" on center). Just this step alone meant getting up and down the ladder and moving it three times. Then I went over and did the opposite beam.
Because each board is 1.5" wide, I made marks 3/4" from either side of the center mark. These outside marks are what I used for location of the hanger. I took my torpedo level and drew lines plumb and vertical down from these marks. I did this along both beams. Then I knew where my joists would go.
Step 2:
Measure the length for the joist. This is actually a tedious step for me, because as one person, I have to secure the body of the tape measure somewhere, then stretch out the tape, stick it in place, and go back and measure. I first climb the ladder beside a beam and set my tape on it. I stretch out the tape about 12 feet. I climb down my ladder and move it over to the opposite beam. I take the end of the tape carefully (to keep from pulling the tape-body down), and get it snug somewhere on this beam. If there's nowhere to stick the metal end so it won't move, I use a hammer to hold it down. I then go back over to where the body of the tape measure is, pull it taut and measure.
However, this length I've established is for the top or crowned side of the joist. To find the length of the bottom I use my torpedo level. I set it plumb against the beam to check if the board in the beam itself is not exactly plumb. If it isn't I measure the gap, either above or below. I also do this on the opposite beam.
The point of all this is two-fold. I want the joist to fit so tight I have to beat it in with a rubber mallet - I don't wan't it just hanging there loose. It's also much easier to get the joist precisely in place and to fasten when it's stuck between the beams.
And the other reason is for what I call the "keystone cut". If the beams, on either side, are not quite plumb, and there is in fact a greater distance between the top of the beams than the bottom (even so subtle as a 1/16"), I can, if not on both sides, at least one side, cut the board with a keystone cut, so that it drops into place and can go no further down. This way as the weight of the floor pushes on the joist, it has nowhere to go, because it's a little longer at the top, and drops in like a keystone.
If conversely the beams are further apart at the bottom than the top, I just ignore it. One reason is I don't get the keystone effect if I cut it flush, and secondly I'm dropping the boards in from above - impossible to do if the bottom length is greater than the space for it at the top.
So this meaasurement's crucial and I try to get it right. And if you consider what a hassle it is to get this board up in the first place, I certainly don't want to bring it back down to recut it.
One last reason for the keystone cut is that since I'm trying to drop the boards in from above, if the bottom of the board is a little shorter, I can get it in easily, then start beating it down. But if the bottom measurement is not shorter, it's very difficult to even get started and wedge the board between the beams.
Step 3:
Cut the joist. I go pick out a 2x10. It's very important to have your wood covered or the sun will warp it, and make it very difficult to install. I've got mine covered with old tarps.
I hold the board and sight down each side to see which is crowned. It is almost inevitable with a board of this length that it will have some kind of crown, or arch. Once I've seen which side is the top of the arch, I carry it over to the saw station, and set it in place with the arch towards me, every time, so I don't make a mistake and cut the wrong length for the top and bottom.
Often a board will not be cut square at the end either. If you can use it, and it works for your custom measurement, great, if not, the first step is to use a speed square and circular saw to cut one end square.
If one of my cuts is not perpindicular, due to trying to keystone the board, I draw a line for the cut on the board and cut it freehand (without using the speed square as a rail). For a while I was using a framing square clamped down for the saw to run along, on a perpindicular cut. But ultimately I decided this step was too tedious and unnecessary for something such as framing - nobody's going to see this cut anyway - and I can do a fine enough job just sighting the line and running the saw along it.
Once the board is cut I carry it crown-side up over to the barn, again so that I don't make a foolish mistake and forget which side is up on the board. I also set it down crown-side up. It seems anal, but it's this sort of mindless routine which quickens your pace and lessens mistakes.
Step 4:
Putting up the hangers. This step can also be done before or after you measure the length for the joist.
I climb the ladder with the 2x10 hanger (got them for 60 cents a piece at a local hardware store, half the cost of Lowe's). I have a small C clamp attached to the top of the hanger so that the sides of the hanger are parallel (they bow out normally). I position the hanger right on top of the lines, and try to guess where the height should be, going by the last joist, and the trend, and then clamp it in place with a bar clamp. It's better to guess too low for the hanger than too high, because it's easy to beat the board up and insert a shim or two, than totally detach and move the hanger down - but I'll discuss this later.
I put in only two 1.5" screws on either side of the hanger, since this is only temporary. Once the joist is exactly in place the hanger will be moved flush with the joist.
I now go over to the opposite beam and put up the other hanger, the same way.
Even though the joist is cut tight, I need hangers to drop it in, to keep the board from twisting left to right and out of plumb. The sides of the hanger keep the joist vertical, then all I have to adjust is height.
Step 5:
Getting the joist up. This is where technique really improved my efficiency. What at first was a monumental obstacle in the process became quick work.
I set the ladder close to one of the beams in line with where the joist will go overhead. I take my joist and pick up one end (crown-side up), and walk it up the ladder and set it on top. Usually it will stay there for a moment, but sometimes I have to hold it. I take a rope and tie it to the last joist I put up. I tie the other end of the rope to the joist end sitting on the ladder. What's key here is choking up on where you tie the rope - don't tie it towards the end. The reason for this is you won't have enough board end beyond the rope to reach up and sit on the beam over the hanger - the rope will want to pull it off if it's not choked up.
I then take my ladder over to the opposite beam where the other end of the board is sitting in the dirt. I take it and walk it up the ladder, holding it carefully, and set it right on the bottom lip of the hanger. It's only in at an angle, just on the edge, because of the way it's tied to the last joist. But it will stay there from weight alone. I never had one fall.
But it is precarious and I do hurry for the next step. I move the ladder back over to the beam where I tied the joist, and pick the end up and set it up on the beam right above the hanger. If possible I try and shove the board away from me deeper into the hanger it's already sitting in. Since the board is now straight I can usually shove it in another 1/2".
I position this joist end so it's exactly over the hanger, so it will drop in. I take my rope I had tied and untie it. I retie it around the joist end sitting up on the beam, as tightly as I can to the beam. I don't want this joist end to be able to wobble. The reason is that as I pick up and pull on the far end of the joist, this end will drop into place - but only if the rope's tight, so that it won't turn left or right.
Once it's tied up I go back over to the other end of the joist that's sitting in the hanger. Now because this board is cut exactly to length, I can't force it in diagonally. So I have to slowly lift this board in the hanger, and pull it flush to the beam, until the other side drops into place. If I've done everything perfectly right I'll hear and feel the other end drop in as I lift my end of the joist. However sometimes that doesn't happen. So I put a block into the hanger to keep this end up, go over to the other end and start beating it down.
Occasionally the joist end that drops doesn't land inside the hanger, but slightly to one side or the other. However it drops with such force that the bottom of the board digs in to the top side of the hanger, holding it there. I never once had a board miss and drop to the ground.
Once both ends of the joist are in, I go back and forth from one side to the other beating each end down until it's down where it needs to be. The reason you have to go back and forth is that as you beat one end down, the other rises slightly. After a while I noticed that instead of moving my ladder over and over again, if I positioned it towards the middle, I could beat towards one end for a while, then towards the other end, and usually get the same results. But much faster.
Step 6:
Getting the joist into position. Now I use my level to figure out exactly where the top of the joist should be. I beat it with the mallet to get it there, or if it's loose, use shims below it in the hanger to raise it to the exact right height. The edges of the hangers keep the board from leaning to the right or left - that's the problem with having a hanger set too high. You've got to totally detach it and then the joist will immediately warp one way or another, and it will be difficult to get the hanger back up straight over your initial lines.
Once the joist is at the right height, I then go for perfectly plumb. This is where my 3' pipe clamp comes in. I use the last joist put in 2 feet away, and tighten the clamp from this joist to either the bottom or top of my new joist to move it. Once I get the board plumb with the clamp, I again check level with the last joist. Typically moving for plumb offsets the height and I've got to tap it back either up or down. Once this joist end is both level and plumb I secure it with toenailing.
I usually use one screw on either side, though I experimented with spiral nails - the idea is to put as little stress on the board as possible so it doesn't move. Ultimately I decided screws were best, as drilling seems less jarring than hammering.
Once the board is toenailed into place, I can begin fastening.
Step 7:
Fastening the joist in place. The first thing I do is unscrew and detach the hanger. I then move it up tight to the joist, and use a 3" C clamp at the top to pinch the ends of the hanger together, flush with the board. Typically one corner of the bottom of the hanger will need tapped up to the board to get it snug. I then put in the bottom screws. I check again for plumb, and possibly adjust the pipe clamp, before putting in upper screws. Since you're dealing with shear force on the fasteners, from the weight of the floor above, I like to mix up the fasteners I use. Actual joist hanger nails are fat but short and expensive. So I use 2 1/2" to 3" drywall screws alternated with 3" ring shank nails. This way I don't have to worry about nails migrating out of their holes, nor the shear force being too much for the screws.
Once I have one end in I go over and repeat everything I did for the other end. And that's that, it's in. You can see why it takes 60 minutes. With another person it'd probably be more like 15, at the most 20.
But there's nothing wrong with something taking a lot of time.
Here's the barn with the first round of joists in, and bridging:

Here's me sealing what I'd done so far:

The purpose of bridging is to stiffen the joists and keep them straight. It also provides more nailing surface for the flooring above.
I cut the bridging from the 2x8 stock (a little cheaper, unnecessary to use 2x10, and you get a reveal, instead of fighting for flush). I gang-cut the pieces and use clamps to hold them in place. I run the bridging in a direct line from front stud to back stud, alternating each piece so I would have a place on the joist to nail it. Here's a shot of the bridging from above:

I rotated either 2 or 3 fasteners to hold the bridging, careful to avoid the same grain in the joist, so there'd be no danger of splitting. The whole idea behind bridging is to strengthen the joists, not weaken them, so I think it's important to be conservative with fastening here.
Here are two shots from below of the joists:

The hangers tie directly in to the blocking, as you can see above:

Here's me sealing the back left corner:

I'm actually a little disappointed in this back left corner. When I got this corner post plumb, and cut my beams for it, I noticed the boards were rather long compared to the rest. In fact my 12' stock wasn't enough, I had to use a 14 footer. But instead of pausing here, and thoroughly examining this, I just plowed on, and ignored it. Never do this in building. If something doesn't add up, it matters, you've got to figure it out. It's like your car making a noise - something is wrong, you better believe it, even if the noise goes away. For me denial almost automatically kicks in.
What happened I realized when I got the last joist in place. It was that the original builder hadn't set the post in exactly the right spot, probably as he was going up the hill with his pole placement. He was an inch or two off. It's just cosmetic - I could come back and spend a day messing with it, to get it perfect - but who knows, that may not be possible, considering all the framing I already have tied in to this corner, and that the post is set in the stem wall. I may just ignore it. I might not have been able to do anything about it in the first place, except set the post at a lean in, and boxed around it - not very structurally sound.
Here's a photo Brooke took just as I finished sealing the barn:

She also took a photo of me standing on top of the barn. We have a great view up there of rolling forested hills:

Here's a shot of the top of the joists:

These post-ends sticking up I then remove with a reciprocating saw. A few I keep to tie in to the framing in the upper story, but most go.
Here's a photo of most of the post-ends removed, and the barn all said and done for the year, as winter's ahead and we're broke:
 We're returning to Atlanta for the winter on September 9th. Patty and I will both work full-time, and try to save as much money as possible, and come back up next year on the 1st of April to remain permanently.
 Looking down from the gazebo:
 The fireplace with the tent removed:
 Closer:
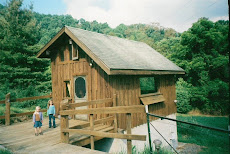
 A shot of the barn:
 Another:
 The compost bin:
 Next year we'll let the left chamber sit, and begin filling the right. The year after we'll have compost.
 Baby mice. They are adorable. I carefully fold the insulation and put it back up where it was.


 You can see the persimmon has put out several big leaves, and the perennial thyme is doing very well. These plants started out in a little tray of six.
 Rachael gave it a shot for a while:


 Here's the area around the gazebo cleared, a big job:

 And you know that line from FIELD OF DREAMS, "if you build it, they will come"? Well in this instance, it was, "if you clear it, they will come."
  You can see him there with his head up if you really study it.


 Here's me sealing what I'd done so far:




























.jpg)

.jpg)



.jpg)






.jpg)
.jpg)

.jpg)
.jpg)
.jpg)
.jpg)


