Back to the land...

This blog is an account of our experiences trying to homestead in Eastern Tennessee. We've bought almost ten acres with power and a well, and a small shed for the well pump. Half the land is already cleared.

This year we haul out 10 tons of trash from an old burned down home. We plant a large garden, and fruit trees, and build a compost bin specifically for humanure. We build a small pad for a gazebo up under the oaks, and begin building our house/barn, with grading, a stone foundation, a concrete stem wall, and the modified post and beam frame. Everything is done by hand. We also dig four thirty foot swales across the top of the clearing and plant the berms with blueberry. A lot of work, and a lot more to go . . .

I'll also cover the process of picking out a piece of land, the negotiation, and "where to begin?" phase, at least how it all went for us.

[YEAR 2] - We build the shell of a 16'x25' two story cabin from scratch . . . check out how it was built.

[YEAR 3] - We try to finish the cabin . . .

[YEAR 4] - I move up permanently to the property to homestead full-time . . .

[YEAR 5] - Rachel and I try to make it as homesteaders . . with a wood cook stove, dairy goats and a cow, finish the barn, expand the garden, fence pastures, plant more fruit trees, build a flock of healthy layers, grow our own animal food - in other words . . . WORK WORK WORK WORK WORK . . .

[YEAR 6]

'Homesteading in Tennessee' is now HOLDOUT FARM. Check out our new farm website. We produce premium quality raw dairy products from our fodder-fed goats, pastured eggs, organic fruits and vegetables, and offer a seasonal list of classes on Permaculture Homesteading.
.

Thursday, August 13, 2009

The Post and Beam Cabin

.

Here is the cabin where I left it at the end of July, basically dried in and missing only the additions and siding (the missing window in the top center has since been put in).

The frame is post and beam, close to 16ft high at the peak, the footprint 16x25, with a large wraparound loft. Here are some interior shots:


The area beneath the loft, where ultimately the bathroom will go:


The temporary kitchen counter, where the kitchen will go:


The french doors, which will go out to the 12x26 addition (living room):


Here you can see I've done the pier foundation for the addition, and it's ready to go for framing:


Here's a shot of the cabin behind the sunflowers:

And a shot of us visiting Big South Fork National Rec Area:

When I can find the rest of the pictures I'll do some articles on the pier foundation and post and beam building, as well as how everything went up there the last 4 months!


Wednesday, May 6, 2009

Homesteading / The Cabin

.
We've been up homesteading in Tennessee now for a month. The weather for the most part has been wonderful, outside of the last 5 days of rain, which has drenched all the South.

The gazebo canvas roof was torn to shreds from snow when we arrived. The girls and I moved it down to the center of the barn. I had to disassemble the roof to get it in. We laid down old boards for planks for the floor, I got a 16'x30' tarp which folded in half made a roof which I tied down to the barn framing. Ultimately we added 4 more tarps which wrap around the entire dwelling, which can be rolled up or left down, the front tarp often rolled up to get in and out. With the bamboo blinds and tarps, the place is like a mini-apartment and very comfortable. We've weathered several severe storms in it - it stays totally dry inside. I put in a $5 clamp lamp for overhead lighting, there's a rug down over the old planks, and the futon of course, now with a double futon mattress - very, very comfortable compared to last year.

We've planted one peach tree and several apple trees. We'd like to eventually have a whole orchard of apples . . . they seem to do well here.

We've got 7 large garden beds planted this year, not only tomatoes and melons, but a whole bed of giant sunflowers also. My wife did a lot of the planting. The girls helped.

We continue to compost humanure, and have bought a mower - it's the ultimate "cover material harvester". Why pay for all that straw? Grass and weeds harvested with a mower are a far better and denser cover material, full of nutrients, site-harvested, and cutting the grass occasionally has kept down the ticks and created more living space. Good humanure compost needs high heat from thermaphilic bacteria, and grass clippings get unbelievably hot inside just sitting in a pile for a day. It's a great discovery.

I'm building dawn to dusk again, and have gone back to my original plan for the cabin in general. I've built 12 16"x16" concrete piers, digging down about 30" for each, putting down packed gravel, a concrete footer with 1/2" rebar, and block with rod and infill where the piers come up substantially above grade. All the block piers were then covered in surface bonded cement for additional lateral strength.

I put in 3 big girders, each 25' in length, composed of tripled 2x10's. On top of this went a 2x10 floor frame. I'm almost finished with the 3/4" flooring. I've ordered the wood for the post and beam frame and rafters. We're still sticking with the additions. Framing lumber is really cheap right now - they say the cheapest in 30 years. I got 16' lengths of 2x10 for only $9 a piece. Last year they were more like $14/$15.

Though ideally I would have liked to do straw bale, we need a cabin ASAP, and once I saw the size of those piers I was putting in, I knew they could support the weight of the entire building. The cabin footprint is now 16x25, and we're going higher, with more loft. Loft will cover most of the upper space and be used for bedrooms for both us and the girls. The final height of the building will be 15', with a short gable roof coming down to 13'. We'll still have clerestory windows over the north and south-facing additions. My wife's been buying windows from Builder's Surplus.

This cabin is going well and one of those projects we're finally going to see through! (though we're already talking about going back out to New Mexico for months - to take the girls to all the places we camped when they were little and now don't remember).

I'll add photos when I can.

Thursday, April 2, 2009

1880 Farmhouse

. I took the girls out to Girl Scouts in Johns Creek, so it was a good chance to stop by Autrey Mill Nature Preserve to see the old farmhouse again - and this time get some photos!

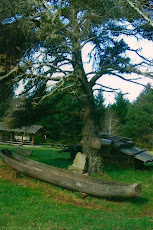
The giant oak out front was probably a much smaller tree back in 1880, when this farmhouse was built. Though it appears some foundation work has been done to keep the house from falling apart (the entire house has seriously rocked back on its pier/sill foundation), it is a vintage home from that period, not a replica. It is almost identical in size to the cabin I'm starting to build in a week. However instead of the traditional front porch (there is just too much traffic in this world to properly enjoy a front porch), we are doing a greenhouse/sunroom.

Here are some shots of the interior. The plank walls:

The doorway from one room into the other (the house is divided into two large rooms - each 15'x16'). It's difficult to see from this image, but the entire doorway is rocked to the side with the rest of the house and nowhere near plumb:

The sign states how everything was reused or recycled back in 1880 farm life - almost nothing was thrown away (i.e. food wastes to pigs, used fats for candles/soap, old clothes for quilts/rugs).
.
The stone fireplace:

An old hutch, with an oil lamp nearby:

A rear doorway, with an old zinc washtub up on the wall:

The plank floor, with a beautiful oval rug on the floor, possibly heirloom:

Here's a shot from outside. It's very difficult to show how much the house has rocked backwards on its foundation, because there's no plumb point of reference. However if you look closely, the small tree is essentially plumb, and you can see as you look higher up on the building it leans back:

Here you can see a pier made of block that has rocked backwards - who knows when this was put in . . . and obviously it didn't do the job:

Here's the rear sill which holds up all the framing in the back of the house, half-eaten away in places:

Here's one of the many joists totally ruined with decay:

The house is essentially ruined because the pier foundation failed. Obviously whatever went underneath each pier wasn't sufficient. Maybe they were stacked above unchanged ground. It's definitely a lesson for the prospective builder - no matter how beautiful your dwelling when first constructed, the question is, will it last?
.
A little past the farmhouse is an enormous tipi:

The interior is rather claustrophobic and dank with a mildew carpet down, and a fire ring:

It reminds me (in a bad way) of the traditional Sioux sweat lodge I did out in Gila, New Mexico, with the moldy carpets, being way way too hot (football-sized glowing rocks, brought in with a shovel), and I couldn't figure out how to breathe the hot steam, so it felt like a torture chamber. However if there were some other type of flooring down, and furniture, it would make a very nice shelter.

Nearby is a hunting lodge made recently by a Native American (I believe Cherokee):

It's essentially a hunting blind where you can take shelter during a hunt. It's ingeniously built. Look at the roof from below:

All site-harvested materials. Here's a closeup of the overlapping bark roof:

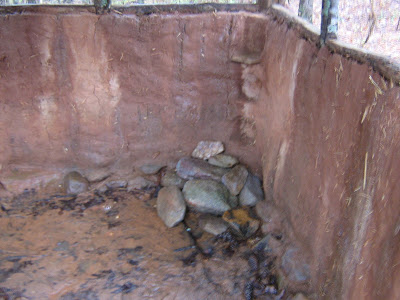
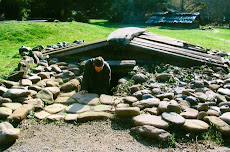
The cobb walls begin on a foundation of rock:

Here you can see the straw in the mud. When you knock on the wall it feels like concrete - very solid:

Here's the interior:

And here's how the wall ties into the roof. Again an ingenious use of the local trees and branches. Though twine is used, I'm sure he could easily have used cordage, if given enough time - especially considering how much native yucca (yucca filamentosa) is around:

.

Thursday, March 26, 2009

The Straw Bale Cabin II

. I've gone and done exactly what someone recommended I should not do - I've doubled the size of the cabin.

The addition to the plans is a south-facing greenhouse/sunroom, so the framing is minimal, the walls will be either plastic or glass over studs, the roof metal, and the floor adobe.

The greenhouse wraps around the south corner of the building because the cabin faces southwest in general - I thought about rotating the cabin so it faces directly south, but it's too tight a space, and it's easier to just change the design, almost like the cabin is growing towards the sun.

Here are two sets of plans, difficult to see but I'll blow up the photos as large as possible:

This is a view looking directly at the cabin from the east. The greenhouse wraps the southern portion of the building, and it's too the left. A patio is located at the northern side of the cabin, to the right. The patio will be made with pavers and have a pergola roof using local saplings that I'll weave into minimal framing. If you look closely at the left of the building, you can see the retaining wall used for the grade for the sunroom (the floor level will be set 1' lower than the cabin floor - you can see the step).

And if you look above the slanted line of the greenhouse roof, where it hugs the east side of the building, you can see brick for the wall. This is another major design change. All of the south-facing walls for the cabin will be thermal mass and made of brick. Every wall facing northwards and exposed to the weather (not buffered by the greenhouse) will be straw bale for insulation.

These thermal mass walls at the back of the greenhouse are a key element in passive solar design, storing the heat the greenhouse generates and radiating it through the building. Because the thermal mass walls are no thicker than the post-girth, tying framing into both sides of the wall will be simple.
.
Here's the same view looking at the model:
.
An economy version of this plan would remove the east side of the greenhouse that sticks out beyond the cabin. I'll have to see how high the sun is once it's cleared the trees. It may be so high this east side would not get sufficient light.
.
Here's a plan looking from above at the layout of the cabin space:

The top of the photo faces southwards. You can see the large attached greenhouse wrapping the south of the building. There will be door access at the bedroom, living room, and an exterior door at the northern (lower left) end of the greenhouse, not far from the exterior door into the cabin itself.

The bottom space (northern) is for the patio - this will actually extend a little farther than this plan shows (ran out of paper), and the posts for it will tie into the southernmost concrete footer in the garden.

I've drawn large walls (16"-18") to illustrate which will be straw bale, as opposed to thermal mass. The stove and hearth will go in the bottom right (nothernmost spot) of the cabin. The idea is the greenhouse and brick wall will radiate heat from the south, and the stove will radiate heat from the north using the highly insulated bale walls.

If you look closely you can see where we've drawn in the bed, and tub, and dining room table, etc. - it's important to locate furniture in a building this small (700 sq feet with greenhouse/cabin, not including loft space and patio) so you know where to put the doors. The area under the loft will be framed and I want to use pocket doors - I'll have to research how this is done.

Here's a look at the cabin directly from the front:


I got pretty sloppy with my popsicle stick framing for the greenhouse - I just wanted to get it done. Small clerestory windows will go in to the cabin above the greenhouse . . . I've always liked that look, and it provides great lighting.

As far as how I will go about building this thing from scratch - I'm still ironing out the details, and I'm sure a lot of decisions will be made along the way. I'm leaning more towards footers for the post and beam frame, rather than putting wood in the ground - but I still have not yet ruled out pole-framing.

The reason for the expansion is to make the cabin more passive solar, create enough real living space for the four of us (rather than a shed), and to create a building that not only has a great look, but is very functional, used for both shelter and growing. I love the thought of tons of greenery growing right inside with us, with wonderful air quality - and the greenhouse will make a great nursery for seedlings, as well as winter food production.

We move out on Monday April 6th, and begin to build. I'm hoping to have the project complete in 6 months.

The first wave of silverberries came in, and I picked a quart one morning for our edible plant walk:


We've saved the seeds and I will also be guerilla gardening throughout the Morgan county area. The next wave of silverberries are much bigger - nearly double the size, with a lot of edible flesh, not just a rind. They taste amazing but most are still not quite ripe. We've got some hedges around here that are putting out great amounts of berries.

Brooke (our youngest, 9) made a life-like volcano . . . she's not ready yet to make it erupt - she's worried about ruining her mountain it took so much time to build:

And my wife made a pair of miniature boot moccasins that someone ordered for their doll:

3/30 Update: I will build the plan for the original cabin first, with a south-facing thermal mass brick wall(s), and once it's finished, put in the greenhouse/sunroom as an addition.
.

Wednesday, February 11, 2009

The Straw Bale Cabin

. My daughters and I built a model of our future straw bale cabin out of popsicle sticks. Everything is held together with glue from a glue gun (hardens in seconds). It's to scale [1" = 1'], so 16" x 24" . . . whereas the cabin will be 16' x 24'.

I'm still attached to my shed roof/loft idea. With a small footprint (388 sq ft), I think it's important to have high ceilings to make it feel spacious. You're going to spend the same money on the floor and the roof anyway. And I like the idea of using all the space in the building - so a sleeping/storage loft will go in at the high side of the roof. My original height was 12' for the high side, sloping down to 9' on the low side. The loft will give a sleep/play place for my daughters so we're not always all together on one floor - it will add another 128 sq ft to the dwelling, and give it a total of 516 sq ft.

This is where the building will go:

This is an old parking slab which I will break up and use as urbanite in the rubble trench foundation. As you can see from the photo, power is right there. Water is about 150 feet away in the well house.

This site is south of the garden, on the southern edge of the level space of the property, before it slopes steeply down to the dirt road. The cabin will go in the 'Garage' site in this drawing of the 9 1/3 acre property:

In searching for various small cabin alternatives to what I propose to build, it was again this photo of a shed roof cabin with clerestory windows that stood out - I know for certain this is the look I want:
Making it happen is the hard part.

Building the model of the cabin has helped me visualize it a lot better. The loft has very little space - not enough to stand or walk around in. And the way it runs across the entire building bothers me:

Would the only access to the loft be on the low side via an upright ladder? It would be difficult to wedge boxes or furniture up through this 2 1/2' high space. And climbing up would be uncomfortable, especially for an adult.

Here's a look with the roof off (it has a 4' overhang throughout to protect the straw bale walls - which is nice, and will create a sort of 'porch effect' all the way around the building:

So we decided to remove one of the three squares of loft flooring to cut it by 1/3:

This opens it up tremendously, and now I can place a vertical loft ladder beside the loft, against the back wall on the high side - this way I've got 4' of overhead for climbing up and storing large objects.

The other change I make is to drop the loft by 6". The loft floor will now be at 7 1/2', and the ceiling below it (framed with 2x8 headers, 2x6 joists 16"o.c., left open with visible joists) about 7' at the bottom of the joists, and higher between them.

The only reason I can drop the floor so low is because I'm going to frame in the area beneath the loft - this is another design change. Before I couldn't have the loft below 8' because I didn't want it to impede our view of the property or be uncomfortable to walk beneath. But now this area will become two rooms completely framed in with pocket doors. The corner space under the loft (8'x8') will be the bathroom, with composting toilet, tub, etc. The 8'x8' space beside it under the loft will become a bedroom. Both of these rooms need privacy, and low ceilings are not a problem considering the way the spaces will be used.

The next design change was to turn the building around. Originally I wanted the high side, with the clerestory windows, facing north and overlooking the garden, instead of the road. But the problem with this (besides passive solar issues), is all the framed rooms beneath the loft will block the view of the property . . . and the open kitchen/living space will have a view mostly south of the dirt road.

So by turning the building around, the open living space will face north - the garden, the barn, the hillside . . . and the framed rooms will block the view south of the road. Also we can face the building more southerly (not exactly south-facing, but southwest - close), and get a much better passive solar orientation.
-
We've been in a building once before just like this, though definitely larger than 16' x 24'. It had a shed roof with a loft, and clerestory windows, with the high side of the building facing south. And the low side had large picture windows facing north. We'd just spent 2 weeks gathering 'desert willow' seed in the Gila Wilderness, to make some money to come back east. This guy in Gila, New Mexico bought it from us for $24 a pound (we had 10 pounds, cleaned). He would later sell it to some company for reforestation efforts. He was staying in the cabin rent-free and remodeling it. We had tea. The view out the windows to the north was spectacular - mountains, the baldies, the south edge of the Gila Wilderness.

Here's a shot looking at the ground floor of the cabin from the east, the door allowing you to enter the kitchen, and the open space continuing on to the dining and then living room, with the framed bathroom and bedroom to the left, and the loft above:

The slate table gives a nice sense of the stone flooring that will ultimately go in.

And in order to raise the ceiling over the loft a little, as well as increase the space of the living area and its windows overlooking the garden, I'm going to raise the north wall from 9' to 10'. And off the edge of the loft where the ceilings go all the way to 12', I'll hang an interesting ceiling fan or something.

Here's the north wall raised a foot with more popsicle stick framing:

And you can see in this shot how much this alters the roof pitch:

Because I'm moving from 'shed roof' territory to 'flat roof' territory, I'm going to go with 2x8's for the rafters instead of 2x6. And with the overhang and near 40% cantilever of the boards, this was the advice of contractors I'd talked to. Sunbright typically gets very little snow (an inch or two), but it is possible in an extreme scenario to get 2'. It's happened before. So I want to make sure the roof is solid. Also the 2x8's will allow deeper insulation - if you don't insulate your ceiling well, all the benefits you get from straw bale walls are lost.

My daughters moved their Barbies in, and Barbie furniture. It's a little oversized for a 16" x 24" dwelling, but it gives you an idea:

Here's another shot, from a different angle:

I made a model out of sticks and rubber bands also, but it's crude and the wood's not straight and it doesn't really tell me anything:

Now on to how the cabin will be built.

I'll start with the pole frame, and the roof - then all the foundation work and wall-raising will go on under roof in shade and out of the rain. The bales are simply infill in this design.

The first step is the sitework - batterboards and masonry line, so you know where everything goes. After that I can begin digging holes.

The first dilemma is whether to go with treated posts embedded directly in the ground, or pour home-made footers and tie above-ground posts into them with metal connections. There's no question the first option is the cheapest, and strongest. Metal connections for masonry to wood at 6x6 are $20 a piece. Then there's the cost of the concrete and rod for the footer, the J bolt, the formwork, and of course, the post itself. And considering the post will be in contact with masonry it really should be treated as well.

My concerns with embedment are the lifespan of wood embedded in the ground, even treated wood (especially at .4 . . . treatment should really be at least .6, and posts for marine use such as docks are treated to 2.0 - however the deeper it's treated the higher the cost and lack of availabilty - 6x6 posts treated at .4 at 16' in length are $32.50 a piece).

I've followed so many threads of discussion on whether pole embedment or footer and have gotten nowhere. There's no question that poles embedded deep in the ground (my book on pole building recommends at least 4') has incredible lateral stability. And I believe the lifespan of any foundation system depends on whether you keep water out of it, regardless of the materials. With a large roof overhang, as well as grading the land down and away from the structure at all points, you accomplish this. A perimeter perforated pipe drain can also go down into the rubble trench to make sure any water that gets in gets out.

And if you do choose to embed the post, how? On top of concrete, concrete around it, a 'concrete necklace', gravel backfill, etc. It seems what's good for strength (such as a concrete necklace, with lag bolts), is not good for drainage. So there's no one surefire solution. I would say drainage is priority #1, over strength - at least in my situation. I've got 12 poles going in from 6' to 8' apart with a good bit of lateral framing as well as the strawbale infill integrated tightly - this cabin's not going anywhere. But if the posts begin to decay . . . that's another story.

I'm leaning towards the idea of gravel base and gravel backfill, and trying to stay away from concrete, if I go with embedment. This will keep water away from the post, and that's all I ask. I'll do whatever I can to make sure water never gets near the foundation in the first place.

I was attracted to the idea of a homemade footer, and using local milled wood for the posts - but the cost is very high. If I could get metal connections for under $10 I'd go this route, but everything I've found is $20 and up. However I haven't ruled it out yet. I like the idea at this site for the footers -

http://www.hammerzone.com/archives/decks/oldporch/found/footing.htm

What's also great about going with footers (besides keeping the wood out of the ground), is working with shorter lighter posts. A 16' 6x6 (wet because it's treated) is unbelievably heavy. I'm going to need a winch to pull them upright if I'm working alone. I found a 'cable puller' for $30 at Home Depot that'll do the job - but I'll need additional cable. If I did footings, I'd be working with 10' and 12' posts - much lighter.

Once all the posts are up I'll create headers out of 2x10's using this design a fellow blogger sent me:

Just like in my barn, the 2x10's are doubled on either side of the posts to create beams. The 2x8 rafters will run across these and tie into them (birds' mouth cuts and possibly metal connections - though I could make a sturdy wood connection between blocking in the headers to the rafters). 1x purlins (strapping) runs across the rafters and provides nailing surface for the metal roof. I've found metal roofing at $2.10 a foot (actually $0.70 a foot because the metal comes in 3' wide strips).

If I go with treated 6x6 posts, the entire frame for the cabin including the roof will be around $1,500.

The next step is the rubble trench foundation around the perimeter for the straw bale walls. I'm going to slope the trench slightly down away from the inside of the structure, and slope it down and around the perimeter so I can put in perforated pipe to drain any water that gets in. This is more for the treated posts than concerns over frost heave. But it will help both. I'll dig the trench 8" deep (frost line is 6"), so I don't have to use so much gravel and urbanite in the foundation. I'll break up the parking slab with a sledgehammer.

Once the trench is in and tamped, it's on to the stem wall. I always wanted to do an earthbag stem wall for straw bale - it made such sense, because it's green and low-cost and local and the same width as the bales. But I couldn't find any information on it. Then I struck gold at this site:

Foundations for Straw Bale Buildings http://www.greenhomebuilding.com/QandA/strawbale/foundations.htm

It turns out earthbags are becoming very common as stem walls in straw bale buildings. The first two rows are filled with aggregate (stone, gravel, sand - whatever), tamped well, with barbed wire between them for tensile strength - just like earthbags. This is so if there is flooding the bottom rows of the stem wall are not washed away. Then the next rows use a stabilized earth mix - your own dirt stabilized with either lime or cement. These will cure and harden into rock. Above this is a water barrier, then the bale walls.

The polypro earthbags are protected via the chicken wire and plastering that the bale walls get. Rod is pounded down through the stem wall and rubble trench - it sticks up to impale at least the first course of bales, and if possible into the second. The curing of the stabilized earth part of the stem wall will lock the rods in place. One possible problem is moisture wicking up the rod into the bales - but I would think caulk around where the top earthbag is punctured as well as the water barrier should do the trick.

As for the bales, I'm going to find something local. Hopefully I can find 2 string bales in the $2 to $3 range.

This is about as far in the planning process as I've gone. The flooring will either be adobe (if we're broke), pavers if not. The loft will be framed off the center posts, and a ledger I'll hang off the exterior posts (the posts are going flush on the inside with the bales, so I can tie into them for framing).

I'd like to do a rocket mass heater to heat the dwelling . . . and all the graywater will be used somewhere downhill, maybe for fruit trees. The door I can get down at Habitat for Humanity in Sunbright. Hopefully most of the windows also. We'll see.

We move up April 1st, and begin building. Only 7 weeks away.

I've been writing articles for Wikihow. Most are how-to's based on articles that are already here. But this one is new material:

How to Camp as a Lifestyle

http://www.wikihow.com/Camp-As-a-Lifestyle

.

Blog Index

10/30/08

BUYING RAW LAND

11/8/08

TRASH CLEANUP

11/10/08

WINTER IN ATLANTA

11/12/08

SPRING IN TENNESSEE

11/14/08

STARTING A GARDEN

11/15/08

BUILDING THE COMPOST BIN

11/15/08

THE FROST

11/16/08

GRADING THE BARN

11/18/08

DIGGING SWALES

11/19/08

PLANTING FRUIT TREES

11/19/08

BUILDING A STONE FOUNDATION

11/20/08

THE CONCRETE STEM WALL

11/21/08

BUILDING A SMALL 12'x12' PAD

11/21/08

THE GARDEN

11/22/08

BUILDING A DRIVEWAY

11/23/08

INSTALLING THE SILL PLATES

11/23/08

THE MODIFIED POST AND BEAM FRAME

11/27/08

FRUIT IN THE GARDEN

11/28/08

THE BARN FRAME

11/29/08

AUGUST IN TENNESSEE

11/30/08

HANGING THE JOISTS

11/30/08

CLEARING THE LAND

11/30/08

COUNTRY NEIGHBORS

11/30/08

THE HARVEST

12/1/08

PLANS FOR A CABIN

12/14/08

THE LAND IN WINTER

12/22/08

BARN UPDATE

12/29/08

WINTER PLANTING

1/4/09

EDIBLE PLANTS

1/10/09

WINTER TREES

1/12/09

WINTER TREES II

1/21/09

CHATTAHOOCHEE RIVER

2/11/09

THE STRAW BALE CABIN

3/26/09

THE STRAW BALE CABIN II

4/2/09

1880 FARMHOUSE

5/6/09

HOMESTEADING / THE CABIN

8/13/09

THE POST AND BEAM CABIN

8/22/09

RETURN TO TENNESSEE

8/25/09

SITE WORK

8/30/09

DIGGING THE FOOTERS

9/4/09

THE PIER FOUNDATION

9/10/09

911

9/11/09

FINISHING THE PIER FOUNDATION

9/12/09

THE GIRDERS

9/13/09

FRAMING THE FLOOR

9/16/09

DECKING THE FLOOR

9/17/09

THE POST AND BEAM FRAME

9/19/09

THE RAFTERS

9/20/09

INSTALLING THE METAL ROOF

9/21/09

FRAMING THE WALLS

9/26/09

DOORS AND WINDOWS

9/27/09

TENNESSEE IN JULY - OUR LAST MONTH

10/2/09

TENNESSEE IN OCTOBER

10/10/09

THE BARN FLOOR

10/15/09

PIGEON MOUNTAIN

11/10/09

NOVEMBER

11/16/09

PERMACULTURE: ANOTHER ROUND OF FRUITING SHRUBS

11/22/09

DRIFTERS

11/30/09

THE BARN ROOF BEGINS

12/20/09

'DRIFTERS' PART I

12/30/09

WEATHER

1/1/10

NEW YEAR'S IN TENNESSEE

1/25/10

DRIFTERS: PART II

3/2/10

MY SISTER'S WEDDING

3/21/10

FERTILIZING WITH HUMANURE

3/28/10

THE ADDITION FLOOR

4/19/10

THE ADDITION

5/11/10

RUNAWAY

6/13/10

FINISHING THE ADDITION

.........................The Timeline.........................

-----------------------------------------------------------------------------------------
1992
-MAY . . . for Patty and I's first date, we skip school and go to the Pinnacle - a wooded overlook off the Susquehanna River.
-SEPTEMBER . . . I leave our hometown of Lancaster, PA for college - Penn State in Reading, 45 minutes away.

1993
-FEBRUARY . . . Patty and I both drop out of school, and camp in some woods behind a grocery store in Lancaster.
-MARCH . . . Patty steals her mother's credit card, and with it we take a train to Utah. We ultimately end up on the Northwest Coast, living in Port Orford, Oregon.
-APRIL - OCTOBER . . . We join a traveling carnival and work in it for 6 months. We sleep in the back of a Ryder truck, and go through California, Idaho, Washington and Oregon. I run the guns, and Patty does the goldfish. We save $9,000.
-NOVEMBER . . . We return to Lancaster and are arrested for stealing the credit card.

1995
-OCTOBER . . . We bike from Lancaster down to Charleston, South Carolina. Patty wrecks in North Carolina, and a friend drives us the rest of the way. We live in Charleston for 2 weeks.

1996
-JULY . . . Our first daughter June is born in Lancaster, PA.

1997
-MARCH . . . We sell everything in our apartment, and hike out of Lancaster with backpacks and our 9 month old daughter. We reach the Susquehanna River.
-APRIL - JUNE . . . We get a canoe and paddle 500 miles up the Susquehanna River to its source. We camp on islands. We get a ride to the Erie Barge Canal and paddle west.
-JULY . . . We are arrested in Little Falls, NY. Our daughter is taken, we're charged with neglect, and we fight the courts for months. We are cleared of all charges, but never get her back.
-SEPTEMBER . . . We take a bus out to Ruidoso, NM and camp in woods just out of town. We return to Lancaster and camp in the Brickyard for the rest of the month.
-OCTOBER - FEBRUARY . . . We live in an apartment in the Amish community of Strasburg, PA. Amish go by in their horse and buggies every day.

1998
-FEBRUARY . . . Our second daughter Rachael is born. We try to deliver her on our own at home and fail. Patty ends up in the hospital with a c-section.
-MARCH . . . We get a ride from a friend down to Covington, Virginia. We stay a week, and look for places to camp in the surrounding national forest. We find nothing, and go to New Mexico.
-MARCH - MAY . . . We camp in the Gila National Forest, north of Pinos Altos, a mile from the nearest trail. We camp above a spring with an infinite view west. We start building a hogan.
-JUNE - SEPTEMBER . . . We live downtown in Santa Fe, NM. Patty markets her paintings, and I get a N.Y. literary agent for my first book 'Flesh Aflame'.
-OCTOBER - DECEMBER . . . We rent a house in Crescent City, California, on the Northwest Coast, a mile from the ocean, on the edge of a bird sanctuary. It's great until the rains begin and we run out of money.

1999
-JANUARY - FEBRUARY . . . We camp in the Uwharrie mountains of central North Carolina, and look for a place to build a winter home.
-MARCH . . . We get a canoe and paddle the Holston River down towards Knoxville, Tennessee.
-APRIL . . . We get dropped off in the Smokies and paddle Fontana Lake. We stash our canoe at Chambers Creek and hike in to the Smokies for a secret camp. Patty paints the creek, and we stay 3 weeks.
-MAY . . . We live in a trailer just off the ocean in Myrtle Beach, SC. The sky is beautiful after storms and we love the pelicans.
-JUNE . . . We camp in the Brickyard back in Lancaster, PA, saving money for an apartment.
-JULY - DECEMBER . . . We live in Lancaster and save for our trip back out to New Mexico. We also buy the jeep.

2000
-JANUARY - JUNE . . . We camp and travel all over the Southwest, from the Gila, to Organ Pipe, to the Weminuche in Colorado. Brooke is born in February in a motel in Deming, NM.
-JULY . . . We stay in condos with a friend in Aspen, Colorado. I do concrete work. We then go to California, and look for a place to live in the Russian River area.
-AUGUST - OCTOBER . . . We rent a small house in Tesuque, NM, just outside of Santa Fe. We hike up into the Pecos Wilderness. We become vegetarians.
-NOVEMBER . . . We visit a friend in Tucson, AZ, then drive to Crescent City and the Northwest Coast. The beautiful weather is over, and the rains have begun. We don't stay long.
-DECEMBER . . . We return to Pennsylvania, and live out of our car in the Philidelphia area while Patty works at a restaurant. We sleep in parking lots and rest stops. It's the coldest December on record for the area, with the wind chill it's -10.


2001
-
JANUARY . . . We head south for warmth, try the Chatooga area of South Carolina, then camp in the woods of northern Florida.
-
FEBRUARY - JUNE . . . We live in Asheville, NC, in the middle of the Southern Appalachains. We spend nearly every day out on the trails, hiking, and learning plants.
-
JULY . . . We get mountain bikes for touring, and bike the Blue Ridge Parkway to the Smokies.
-
AUGUST . . . We camp in the Weminuche Wilderness of southwest Colorado, and do a 6 day fast.
-
SEPTEMBER . . . We stay in Loveland, Colorado with a friend. We climb Long's Peak on the day after 9/11. We then drive to Vermont, and look for a place to live in the Burlington area.
-
OCTOBER - DECEMBER . . . We rent a house in Tucson, AZ, and try to become raw fooders.

2002
-
JANUARY . . . We hike in to Jordan Hot Springs in the Gila.
-
FEBRUARY . . . We bike in to Turkey Creek Hot Springs. We stash our bikes near the mouth of the creek, and hike the rest of the way. Many of the pools have been ruined from floods.
-
MARCH . . . We go to Vermont again, this time the Bennington area of southern Vermont. It's way too cold.
-
APRIL - JULY . . . We rent a house in Asheville, NC again. This time we have a large garden, and become 100% raw fooders. Every day I'm out hiking the trails gathering wild edible plants.
-
AUGUST . . . We cash out all our credit cards, and move up to Shining Rocks Wilderness in the Southern Appalachians, camping at over 5,000 feet. There are blueberry fields everywhere, and blackberry, and wild cherries. Not only are we mono-raw fooders now, much of our food is wild. I hike barefoot everywhere. We bathe in the pool below the falls.
-SEPTEMBER . . . We visit a friend in Atlanta, and on a night full of alcohol I break my foot in 3 places. I'm told I'll be crippled with arthritis, and ultimately never walk again.
-OCTOBER - DECEMBER . . . We rent a furnished condo in Tucson, AZ. I cut my cast off prematurely with tin snips.

2003
-JANUARY . . . We camp off the Gila River at Box Canyon, just up from the city of Gila. I'm still on crutches. We meet Jabber-Mike, and Vet-Mike, and Doug. We trade juniper berries for Doug's black walnuts. We're still 100% raw fooders, and Doug teaches me the local plants.
-FEBRUARY - MARCH . . . We return to Atlanta for free medical care so I can learn how to walk again. PT is hell.
-APRIL - MAY . . . We go back to the Gila and camp off the Gila River. We gather cattail, nettle, primrose flowers, and harvest prickly pear pads. We find the most perfect hot spring in all of the Gila, man-made, at Brock Canyon.
-JUNE . . . We fall off our raw food diet, and camp up at Black Balsam again off the Shining Rock Wilderness. We gather wild strawberries. We then camp above the Amicalola Falls in north Georgia for 2 weeks. We become committed to the idea of buying land.
-JULY - SEPTEMBER . . . We live in Woodstock, GA, just north of Atlanta. I do a 14 day water fast.
-OCTOBER . . . We paddle Fontana Lake in the Smokies, on our way to Nova Scotia. We find a great camp and gather wild persimmons, but ultimately abandon the trip.
-NOVEMBER . . . We go back to camping off the Gila River at Brock Canyon. I begin 'June'. We run totally out of money, and gather and clean 10lbs of desert willow seed to sell to a local guy in Gila. He gives us $20/lb, and we use the money to get back to Georgia.

2004
-JANUARY . . . We go to north Florida, and check out the sinks, and the aquifer springs, and paddle the Wacissa River.
-FEBRUARY . . . We paddle the Suwanee River in North Florida. Patty makes a basket out of greenbriar.
-MARCH . . . We camp in the pine flats of Apalachicola National Forest. We make baskets from grapevine, cordage from the retting of Spanish Moss, and a mat from palmetto. We camp here for 3 weeks with no money while we wait for our tax refund. We're 100% raw fooders again.
-APRIL . . . We camp off Owl Creek and paddle the river. There are free hot showers in a nearby campground. There's a great trail with wild blueberry, and we gather the new shoots of bracken. We later camp in Tate's Hell.
-MAY . . . We camp at Sand Creek in the Ocala National Forest, an hour east of Atlanta. I gather cattail in the Beaver Pond. I edit and type up the 'June' book at a nearby library for a literary agent.
-JUNE . . . We drive out to Oregon and camp off the Illinois River in the Siskiyous.
-JULY . . . We camp in the Adirondacks off Jones Pond.
-AUGUST . . . We camp in the Jemez Region of northern New Mexico. We gather wild mushrooms, and sell lobster mushrooms to chefs in Sante Fe. We camp at San Antonio Hot Springs for a week, and Big Tesuque Campground outside Sante Fe.
-SEPTEMBER . . . We go back to the Gila and camp at Brock Canyon. We gather desert willow seed again. We swim and play games in the river. We see tarantulas. I gather prickly pear fruit in baskets we've made from willow. We take a trip up to Turkey Creek Hot Springs.
-OCTOBER . . . We camp in the Oconee National Forest southeast of Atlanta, under persimmon trees in a field. We also camp up on Pigeon Mountain near Rocktown.
-NOVEMBER - JANUARY . . . We live in Atlanta.

2005
-FEBRUARY - MARCH . . . We move to Portland Oregon. We paddle the Wilamette River, and go to the nude beach at Sauvie Island, just after Mt. St. Helens erupted.
-APRIL . . . We return to north Florida looking for land to buy. Everywhere is flooded, and there's been a lot of damage from the previous hurricane.
-MAY . . . We camp up on Pigeon Mtn. The weather's perfect, and there's more wild food here than anywhere else.
-JUNE . . . We go to Arizona, and camp in the Hannigan area of Apache National Forest. We ultimately try to get back out to Oregon, but car problems make it not possible.
-JULY . . . We return to Pigeon Mtn in Georgia. The blackberries are in.
-AUGUST . . . We stay in a campground off the ocean in Jacksonville, Florida, while we look for jobs and a place to live.
-
SEPTEMBER . . . We move back to Atlanta.
-
OCTOBER . . . We abandon the jeep with 320,000 miles in a motel parking lot.

2006
-MARCH . . . the girls and I camp up at Pigeon Mtn, in a secret camp we've made.
-JUNE . . . the girls and I go back to Pigeon and camp longer, this time starting a wigwam from red maple saplings, muscadine vines, and grass I collect naked in the field with a small knife.
-AUGUST . . . the girls and I camp up at Graveyard Fields off the Blue Ridge Parkway. Every day we gather the wild blueberries and swim in the pool beneath the falls. We hike all the trails, and establish a secret camp in a grove of juneberries.


2007
-FEBRUARY . . . We look at property in north Florida.
-MARCH . . . We look at property in Asheville, NC.
-JUNE . . . We look at the 10 acres in Sunbright, and make an offer.
-AUGUST . . . We close on the Sunbright property, and take the kids to Disneyworld.
-OCTOBER . . . The girls and I camp up on the property in Sunbright, and clean up the trash from the fire. I build a fireplace out of old concrete blocks.

2008
-APRIL - SEPTEMBER . . . The girls and I camp up on the property. We clean out the rest of the trash, build a compost bin for humanure, plant the garden, and fruit trees, I dig the swales, do the stone foundation for the barn, and the stem wall, and the post and beam frame. We build a pad for the gazebo.

2009
-APRIL - JULY . . . The girls and I camp up on the property again. We build the 2 story cabin from scratch, plant another garden, and more fruiting trees and shrubs.
-OCTOBER . . . I put the upper story floor in the barn.
-NOVEMBER . . . The girls and I begin building the barn roof.