Back to the land...

This blog is an account of our experiences trying to homestead in Eastern Tennessee. We've bought almost ten acres with power and a well, and a small shed for the well pump. Half the land is already cleared.

This year we haul out 10 tons of trash from an old burned down home. We plant a large garden, and fruit trees, and build a compost bin specifically for humanure. We build a small pad for a gazebo up under the oaks, and begin building our house/barn, with grading, a stone foundation, a concrete stem wall, and the modified post and beam frame. Everything is done by hand. We also dig four thirty foot swales across the top of the clearing and plant the berms with blueberry. A lot of work, and a lot more to go . . .

I'll also cover the process of picking out a piece of land, the negotiation, and "where to begin?" phase, at least how it all went for us.

[YEAR 2] - We build the shell of a 16'x25' two story cabin from scratch . . . check out how it was built.

[YEAR 3] - We try to finish the cabin . . .

[YEAR 4] - I move up permanently to the property to homestead full-time . . .

[YEAR 5] - Rachel and I try to make it as homesteaders . . with a wood cook stove, dairy goats and a cow, finish the barn, expand the garden, fence pastures, plant more fruit trees, build a flock of healthy layers, grow our own animal food - in other words . . . WORK WORK WORK WORK WORK . . .

[YEAR 6]

'Homesteading in Tennessee' is now HOLDOUT FARM. Check out our new farm website. We produce premium quality raw dairy products from our fodder-fed goats, pastured eggs, organic fruits and vegetables, and offer a seasonal list of classes on Permaculture Homesteading.
.

Sunday, September 20, 2009

Installing the Metal Roof

.

We've decided to go with a metal roof for these reasons - cheap, doesn't leak, and long-lasting [the roof comes with a 40 year warranty]. It's also the choice most compatible with rainwater harvesting and a cistern, which will be placed on the NW side of the cabin.

Everyone in Tennessee, from builders to the actual metal roof vendors themselves, had told me I could use purlins to attach the metal to. These are basically boards [often 1x] laid horizontally across the rafters every 2', and they're what the metal sheets are screwed to. It sounded easy, cheap, and practical - I could actually install the sheets from the comfort of the loft because I could stand and reach through the rafters between the purlins.

We'd actually ordered all the 1x material for the purlins and had it delivered. But literally the day before I put the purlins in, my wife did some research on how metal roofs should be installed, and told me to STOP! Every single authority on the internet, sites like This Old House, contractor sites, metal roof sites - all recommended going with a conventional roof approach - which means sheathing, tarpaper [30lb roofing felt], then metal. The reason? Sheathing makes the roof stable and strong, it won't dent if something falls on it or someone walks on it, it's a must if you plan on insulating the roof, and the tarpaper stops condensation. Apparently a metal roof drips underneath from condensation when only purlins are used. My next door neighbor has installed a metal roof over his barn, with only purlins, and he says it drips all the time from condensation.

I called back the metal roof people I'd ordered my sheets from, and asked if you could use sheathing and roofing felt. They said that you could, that that was the best way to do it . . . and I wondered, why didn't you tell me the best way in the first place? Apparently for the average owner-builder, what's cheapest and easiest is what they do, especially in a land of no codes. I'm happy there're no codes, but . . . things should be done the right way, especially by the 'experts'. They shouldn't be giving out half-baked advice.

So now that I know my roof is going to be much heavier with all that sheathing, I first beef up the frame. I do a little preliminary wall framing, essentially a picture frame with 2x6's to create a lower and upper story all around the building - I don't want to be putting in 13' studs.

So I put in 2x6's up against the posts on the lower story, to support a top plate [to be doubled later] of 2x6's at 7.5' in height - where the bottom of the loft joists is. And all the 1x4's I now have no use for, I attach to the building as a temporary diagonal bracing until the wall sheathing goes in. Here's a pic:

The thick dark horizontal boards are old roughsawn 2x4's from the barn - they are also temporary.


The first step in installing the 7/16ths sheathing is to straighten the rafters across the middle with furring strips. Once this is done I nail up bumpers to the tails of the rafters, so that when I set the sheathing up there, it won't slide off the roof. I put in sheathing at the outside first, then move towards the peak, staggering the joints on different rafters.

On the first row of sheathing, I measure from the peak down to get the exact location for the sheets. I clamp the sheet and bump it around with a mallet a little to get it right where it needs to be. I then tighten the clamps and hammer in ringshank nails, which have a great permanent hold, but can be somewhat of a pain to get in, as they want to bend.

Here's me working on the first sheets:

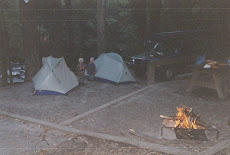
Here's a shot of the barn (a.k.a. Tent City), where we're living as we build:

And a shot of the fireplace. I've removed that horrible ramshackle wall I'd put up last year with old boards to keep the gales from destroying our screened-in tent. The screened-in tent is now in the barn as you can see above. The fireplace is actually usable again!

Here half of the sheathing is in:

The most daunting prospect at first was how I was going to get the sheathing up there in the first place. But it was actually easy. I shoved it up on to the loft, then from the loft shoved it halfway through the rafters, then got up on the roof and pulled it through the rafters. The 7/16ths is very strong with a lot of flex - none of the sheets snapped.

Here are the girls with the stray dog Annie that showed up and we've been feeding. She keeps me up all night barking at shadows - I'm not too thrilled about her company. She's also got a game leg. A lot of people dump off dogs back here:

Here's the garden, with many plants taking off:

Here most of the sheathing is in - you can see the stakes I'd used as bumpers attached to the rafter tails:


Here's a shot from below:

Another:

After almost all the sheathing is in (I leave a little 'manhole' space at the peak for me to go through and to bring up materials), I roll out the felt. I start at the bottom, and do a large overlap for each successive layer going up towards the peak. I attach the felt with a staplegun till it jams up, then use buttoncap nails.

It's only a few hours to put in the felt. Here're a couple shots of it in:


The next step is the metal itself. It took us a while to decide on the color, but ultimately we went with crimson. We wanted something that really stood out and popped. If over time we hate it we can always paint it - in fact it's recommended to paint your metal roof every 5 years to increase its lifespan. It's only the paint finish that keeps the metal from rusting and decaying.
.
The sheets come in standard 3' widths. It's the length that is cut to order. I measure down from the peak, substract 3" for ventilation at the top, then add 3" for covering the fascia and overhanging it - I come up with a length of 9'4". The metal roof installers typically order the metal for the length of the rafter, because the overhang and ventilation gap are equal.
.
I get the sheets up to the roof by rolling them up and attaching a bungee cord. I then shove this up through the rafters, and pull it through from above.
.
I have to remove my bumpers because the metal overhangs the rafters. So when I get the first sheet in place I have to hold it with quick-grip clamps.
.
I'd previously run a line from one edge of the peak to the other, then measured down 3" for where my metal should start. The gap allows for ventilation out the ridge cap.
.
As far as laying down successive sheets, I find that if I run sealant tape (really a sticky putty) down the rib which will be overlapped with the next sheet, the sheet I'm laying down sort of sticks to the putty and doesn't want to slide down and off the roof. The sealant tape also guarantees water won't wick up under the rib and leak in - it's recommended on any pitch shallower than 1/3.
.
Once the metal sheet is right where it needs to be, I predrill and fasten with screws. The screws I got from the metal manufacturer - they are painted and come with rubber gaskets. I'd had to buy a drill with a clutch for this step [Hitachi/corded/$50/awesome], so the screws don't get overdriven and cut the gasket. They have to seat just right . . . as soon as the gasket begins to flatten out, you stop driving. When the drill's got a clutch it does this automatically.
..
I predrill with a 1/8" bit every 2' down a rib - this was recommended by the manufacturer. Every bit I have breaks except the short double-tipped bit the metal guy had given me. It just barely sticks out of the drill, so the bit won't snap. The bit just sticks out enough to punch a hole in the metal - and that's all I need.
.
Here one side of the roof is done:
.
I then lay down 'gutter guard' (a plastic mesh) to keep critters from getting in through the ventilation gap at the peak:

This is what the metal roof installers use.
.
I'd forgotten to mention that before I even put the sheathing in, I put blocking between all the rafters above the ridge beams. The blocking at the eaves is a little short, made with 2x4's, so there's a gap above it before the sheathing. This is for ventilation up through the soffits and out the ridge cap. Here's a pic:

Since my 'manhole' between the rafters must now be closed to roof the other side of the building, I put in boards to get up to the roof for the final sheets. I first shove the last materials up through the hole, then seal it with sheathing and felt. For my improvised ladder up to the top, I cantilever 16' boards out the side of the building. They work great:

The last metal sheet on the first side I'd put in incorrectly. I actually have to remove it one dewy morning, and the roof is so slippery I begin tying myself in. I quadruple up some rope, and tie it from my waist to the frame inside the building. It's somewhat of a nuissance avoiding stepping on the rope, but it gives me a great sense of security, that if I fall, at least I won't go off the roof - I'll have the rope to hold on to. At one point I make the very dumb error of trying to move one sheet over a little with my foot, and I start skiiing down the roof on the sheet. But I jump off and the metal stops and everything's okay.
.
The final hours of installing the metal roof are brutal. It's a hot day, and the metal magnifies that a thousand times. I've basically locked myself up on the roof with the last of the materials to get it done. After the last sheets, there's the ridge cap to put in, 3 lengths of 10' each, somewhat overlapped. I use a longer screw for the ridge cap so that the screw actually catches the sheathing and bites in. It is brutal, endless, and when I get off I drink a quart of water straight, and go throw myself in the pool. But it's now finished, we have a roof! That's something to celebrate:

Here's a look at it from inside:

We get a heavy rain, and I notice a drip drip drip on the loft floor. I calm down when I realize rain is collecting on the cantilevered boards, flowing down them and dripping off. The roof is watertight. The roof does pop though, when it gets extremely hot. The metal actually expands and contracts (that's why rubber gaskets are used with the screws), and when it does it pops just like a metal can. Bong! But it's not that often, and it's something you get used to.
.
A final shot of the roof in:
.
.

Friday, September 18, 2009

The Rafters

.

For rafters I go with 2x6's spaced 16"o.c. The truss engineer I'd talked to at the lumberyard had said that considering the short span (a little over 8'), the relatively lightweight roof and lack of snow load, with some pitch (1/4 - the rafters drop 2' over 8') - he thought 2x6's would be fine. So that's what I went with. Originally I'd planned on going with 2x8's, but that was when the boards would be cantilevered out from 3 to 4 feet to protect the straw bale walls. Now the rafters will only overhang 1', because right below the overhangs will be the rooves of the additions.

The rafters take several days to put in, and are the most tedious step. I could have saved myself a ton of time by cutting them all the same and just popping them in, regardless of how well they fit. But instead I make precision custom cuts for each rafter, so they will fit exactly in place. There are four precision cuts for each rafter. The plumb cut at the eaves, the 2 birdsmouth cuts where the rafter will sit on the lower and upper ridge beams, and finally the 'lop' cut at the top where the ends of the rafters go beyond the opposing rafter. Instead of a plumb cut at the top [peak], I overlap the rafters and join them together with clamps and screws.

Why go to all this work? Mainly a design issue. Because of the importance of open space and headroom in the upper story of the building, I could not put in collar ties except the two at the outside. Collar ties keep the rafters from flattening out. So what I did was to double seat the rafters on both ridge beams, and join each pair together at the top. This should create a connection so rigid that the rafters will not move.

To get my custom cut I propped the board up on the ridge beams, hold it in place with bungee cords (clamps, if it really won't stay put - but usually a tight cord does the job), then mark my lines. Each rafter has the same measurement mark of where it should be positioned on the upper ridge beam. Once I get the mark where it needs to be, I strap on bungee cords tightly at both ridge beams. I use a ruler to mark the location for the 2 birdsmouth cuts. I simply lay the ruler flush against the side of the ridge beam, and continue on with the line up . . . then lay the ruler flush across the top of the ridge beam, and continue the line on across.

I make most of the cuts with a circular saw, then finish each notch with a jigsaw [It makes no sense to me the conventional practice of overcutting with the circular saw to get out a notch. Why weaken an already stressed point in the rafter, simply for the sake of speed?].

After I've cut out both notches, I check the fit. Usually it's good:

Once in a while I have to retrim and cut out a little more. But the rafters sit up there squarely and don't budge, before I even fasten - this is what I'm looking for.

I next make the plumb cut at the tail - something I should not have done. It's much better to put in all the rafters, then run a line where you want your plumb cuts, and do them all together. At the time I thought there was no way I wanted to make all these cuts high up on a ladder. But actually I could have made most of them reaching out from the loft. I would have gotten a much better line for my fascia boards if I had done this.

The rafter is then fastened in place with predrilling and toenailing [with screws]. I use clamps to get the board upright and to hold it in place while I fasten.

The next rafter I put in is on the opposite side so I can join them together. Once both in the pair are in I can mark where they need lopped at the peak to be flush. Here I'm clamping and fastening them:

This is a finished pair:

Here several are in:

It took 2 full days to get to this point:

The last rafters go in where there is no loft floor, so everything on one side is done either standing on braces or a ladder - much more difficult.
.
Here's the underside of the rafters:

You can see the knee braces that went in just before the rafters to stabilize the post/beam connection at the top.
.
Here's a shot of how the pairs of rafters meet up at the peak:

Another one, from a different angle:

Here all of the inside rafters are done. Only the barge and possibly fly rafters need to go in beyond the walls - I haven't yet figured out what the overhang is going to be at the gable end:
The metal roofing comes in 3' wide sheets, so I'm ordering enough for a 27' wide roof. The building is 25' wide. My ridge beams are 26' long. Originally the beams were only going to be 25' - but considering the dimensions of the wood I'd used added up to 26', I thought why shorten it? It'll help support the rafters beyond the building. The problem is, I should have made the beams a little longer, at least 26.5', so I wouldn't need to have rafters sticking out beyond the beams. What I'll have to end up doing is doubling up the rafters at the end, maybe even adding a little blocking, so that the edges of the metal roof aren't sticking out too far unsupported past the framing.
.
I make another huge error, and it isn't until I frame out the windows that I realize it. I was so bent on spacing the rafters equally across the roof, I forgot that there must be a rafter flush with the outside of the wall at the gable ends. This is Carpentry 101. It's such a stupid mistake, and later I have to come in and put up blocking for little faux rafters to seal the upper portion of the wall and give a place to attach sheathing to.
.
Here I'm working on a doubled knee brace:
.
A shot from below:

The rafters will be straightened with furring strips before I install the roof.
.
Here's a shot of the lower story. It's opened up now, with most of the bracing removed as I needed it for rafters:
.
Me working again:

Here below you can see, especially if you click on the picture and blow it up, where I've doubled the outside rafters to push out the framing a little further to support the roof. The inside pair of rafters are run flush and butted at the peak with plumb cuts. The outside pair overlap the butt joint with a custom fit. I actually had to create a template to be able to make these cuts for a good fit.
.
The framing for the roof is now 26' 4", about 4" shy of what it should be to support the 27' metal roof [the metal can overhang 2" at each end]. I might add some blocking, or another pair of rafters:

On a different note, we always have different types of frogs and toads hanging out at our pool. The girls get ahold of a toad and treefrog and get a couple shots of them hanging out:

The treefrog on the right has bright yellow markings under his thighs.
.
Another shot:

.

Thursday, September 17, 2009

The Post and Beam Frame

.

I went with post and beam rather than conventional stud framing because we haven't yet purchased our doors or windows. In fact our whole design we're pretty much making up as we go along. With the post and beam I can get the frame and roof up and work in doors and windows later. With stud walls I'd be locked in to whatever rough openings I'd made.

Another reason the post and beam approach appeals to me, at least in this situation, is I can keep all the weight directly on the piers. There are 12 piers, so I'll do 12 posts right on top of the piers, and put no strain on the girders.

My posts will be made of tripled 2x6's, so nominally 6x6 [actually 4.5" x 5.5"]. I had the opportunity of discussing my cabin plans with a roof truss engineer at the lumber yard. I did a drawing for him and asked his advice on what dimension wood I should choose. He believed tripled 2x6's would work best, and be actually much stronger than a 6x6 post.

I double up my 2x6's first to create my posts. I use glue and clamps and screws - some nails also. The screws are 2 1/2" drywall, the nails ringshank. Since the floor is dead level, I can basically gang cut all the posts so they are identical in length. I've got eight 13 footers, and four 15 footers for the center ridgeline. The two 15 footers in the middle are actually cut 1 1/2" longer than the others, because they tie directly into the floor without a sole plate.

The reason I don't triple up on the posts is to keep the weight down, while I wrestle with putting them up and bracing them in place. When the frame is interconnected and stable I'll then come in and sister the posts with an additional board so they're full-size.

Putting the first posts up is scary. They're not that heavy, but they are so high . . .! Especially the 15 footer. As long as I don't look up I'm fine. I just focus on getting it plumb right in front of me, then clamp it to the braces I've prepositioned [I've attached diagonal braces to the band joists, so all I've got to do is clamp the post to them when I've got it up. I can then tap it around with a mallet to get it perfectly plumb, and fasten. Screws of course, so I can later remove them].

I also fasten blocks to the center of the floor to give spots for diagonal braces to tie into. Here I've got the first three posts in, securely braced:

A closer shot:

All of the above braces are temporary. I now put in my first permanent horizontal board, call it a band joist, ledger, whatever - it's a 16' 2x8, and it will act as the header joist for all my loft joists on this side of the loft [our bedroom]:

The girls and I continue putting up posts and bracing them. I also put up more horizontal 2x8 boards - all of them header joists for the loft.
.
One thing that makes it a little more exciting is that Patty has no idea we've gone on to this step, and it's a secret. I'd told her she had to be here to help me get the posts up . . . that there was no way I could do it myself. But as usual I stubbornly plow on and try - with rope, bungee cords and clamps anything's possible. The kids also come in handy for reading the level, or tightening a clamp.
.
Here most of the posts are up:

In the foreground is my portable table for clamping boards - we call it the cut station, and it's set up right beside the lumber.
.
Here I'm putting the ladder away in the pumphouse after a long hard day:

Here all of the posts are in, with a maze of bracing:

A closeup:

We've got to be very careful how we walk around in here, or we bang our heads on a brace [I do it about 20 times].
.
Another shot of the posts and band joists in for the loft floor:

I next put in the joists for the loft and deck it - the same 3/4" Adventech. Since the joists and band are flush I use hangers. I have to be very meticulous here and hang each joist perfectly because these connections will be visible in the finished cabin. I cut the boards just right, set them up in loosely attached hangers, get the end of the joist where I want it, predrill and toescrew, then unattach the hanger and push it up snug around the joist, and clamp and fasten it. It's tedious, but the end result looks very good. There are no ugly gaps between hanger and joist like I so often see on sloppy framing.
.
The reason the loft goes in next is so I can stand up there to build the roof. The first step is putting in the ridge beams that connect the tops of the posts - these beams will take all the weight of the rafters that are spaced 16" o.c. The beams are doubled up 2x8's, 26' in length, centered above the top of the posts.
.
I first straighten and make plumb the upper part of the posts. I use rope and clamps and braces. I first try pulling the post with rope, then fasten it to a brace once it's plumb. But it's much easier to clamp the upper post to a brace, then bang it over with a mallet till it's plumb. Once it's plumb, fasten it to the brace. This is much, much faster than using rope, and more effective. It's good the posts are only doubled, and not tripled, at this point, or they'd be far more difficult to straighten.
.
For the first beam I build it on the loft floor, then Patty and I try to hoist it up on to the top of the outside posts. This is nearly a disaster. I've clamped up 'bumper' blocks to the outside edge of the posts so there's no risk of the beam sliding off the top of the posts once we get it up there. Patty and I are about 15' apart as we hoist the beam. What happens is that my end of the beam gets caught outside the end bumper block, and we're both stuck holding this enormous weight as I try to move the end around and get it positioned right. We do finally get it in, but it's stressful, and exhausting. Next time I'll build the beams in position up over the posts board by board.
.
Here the outside ridge beams are in, plus more diagonal bracing [I'm using the 2x6 10' rafters to brace]:
.
Each outside ridge beam is tied to the other through 16' 2x8 collar ties that fit fully into a notch on the 15 footers. I joke and call it my 'daring notch', but it ends up being rather easy. This tie helps hold everything together, as the framing at this height has a lot of shear load.
.
Here's a closeup of the tie:

Here's a shot of some of the temporary bracing, somewhat out of control:

I next triple up the 15' posts, because the boards for these posts are oriented in such a way that all three need to be in to center the ridge beam above them. I build the entire beam in place, one board at a time, using glue and clamps and fasteners. I've found some heavy-duty metal angles to use on either side of the posts for each connection (in addition to toe-screwing). Each connection gets a variety of screws and nails, plus one big 20d nail driven up into the beam, acting as a sort of spike. I've been told by builders that though the shaft of a screw is tough, and screws have great hold, very large nails have a higher resistance to shear force. So it's good to have a combination of both.
.
Here you can see the tripling up of the 15' post, using glue and mostly 16d framing nails:

I put in a lot of blocking beneath where every post goes, so every fastener used for a post / floor connection is driven deeply into wood - not just caught in decking.
.
Here's the high center ridge beam:

I take a couple of photos of the view off the loft overlooking the property. Here's looking over the garden:
.
Here looking towards the barn:

.

Blog Index

10/30/08

BUYING RAW LAND

11/8/08

TRASH CLEANUP

11/10/08

WINTER IN ATLANTA

11/12/08

SPRING IN TENNESSEE

11/14/08

STARTING A GARDEN

11/15/08

BUILDING THE COMPOST BIN

11/15/08

THE FROST

11/16/08

GRADING THE BARN

11/18/08

DIGGING SWALES

11/19/08

PLANTING FRUIT TREES

11/19/08

BUILDING A STONE FOUNDATION

11/20/08

THE CONCRETE STEM WALL

11/21/08

BUILDING A SMALL 12'x12' PAD

11/21/08

THE GARDEN

11/22/08

BUILDING A DRIVEWAY

11/23/08

INSTALLING THE SILL PLATES

11/23/08

THE MODIFIED POST AND BEAM FRAME

11/27/08

FRUIT IN THE GARDEN

11/28/08

THE BARN FRAME

11/29/08

AUGUST IN TENNESSEE

11/30/08

HANGING THE JOISTS

11/30/08

CLEARING THE LAND

11/30/08

COUNTRY NEIGHBORS

11/30/08

THE HARVEST

12/1/08

PLANS FOR A CABIN

12/14/08

THE LAND IN WINTER

12/22/08

BARN UPDATE

12/29/08

WINTER PLANTING

1/4/09

EDIBLE PLANTS

1/10/09

WINTER TREES

1/12/09

WINTER TREES II

1/21/09

CHATTAHOOCHEE RIVER

2/11/09

THE STRAW BALE CABIN

3/26/09

THE STRAW BALE CABIN II

4/2/09

1880 FARMHOUSE

5/6/09

HOMESTEADING / THE CABIN

8/13/09

THE POST AND BEAM CABIN

8/22/09

RETURN TO TENNESSEE

8/25/09

SITE WORK

8/30/09

DIGGING THE FOOTERS

9/4/09

THE PIER FOUNDATION

9/10/09

911

9/11/09

FINISHING THE PIER FOUNDATION

9/12/09

THE GIRDERS

9/13/09

FRAMING THE FLOOR

9/16/09

DECKING THE FLOOR

9/17/09

THE POST AND BEAM FRAME

9/19/09

THE RAFTERS

9/20/09

INSTALLING THE METAL ROOF

9/21/09

FRAMING THE WALLS

9/26/09

DOORS AND WINDOWS

9/27/09

TENNESSEE IN JULY - OUR LAST MONTH

10/2/09

TENNESSEE IN OCTOBER

10/10/09

THE BARN FLOOR

10/15/09

PIGEON MOUNTAIN

11/10/09

NOVEMBER

11/16/09

PERMACULTURE: ANOTHER ROUND OF FRUITING SHRUBS

11/22/09

DRIFTERS

11/30/09

THE BARN ROOF BEGINS

12/20/09

'DRIFTERS' PART I

12/30/09

WEATHER

1/1/10

NEW YEAR'S IN TENNESSEE

1/25/10

DRIFTERS: PART II

3/2/10

MY SISTER'S WEDDING

3/21/10

FERTILIZING WITH HUMANURE

3/28/10

THE ADDITION FLOOR

4/19/10

THE ADDITION

5/11/10

RUNAWAY

6/13/10

FINISHING THE ADDITION

.........................The Timeline.........................

-----------------------------------------------------------------------------------------
1992
-MAY . . . for Patty and I's first date, we skip school and go to the Pinnacle - a wooded overlook off the Susquehanna River.
-SEPTEMBER . . . I leave our hometown of Lancaster, PA for college - Penn State in Reading, 45 minutes away.

1993
-FEBRUARY . . . Patty and I both drop out of school, and camp in some woods behind a grocery store in Lancaster.
-MARCH . . . Patty steals her mother's credit card, and with it we take a train to Utah. We ultimately end up on the Northwest Coast, living in Port Orford, Oregon.
-APRIL - OCTOBER . . . We join a traveling carnival and work in it for 6 months. We sleep in the back of a Ryder truck, and go through California, Idaho, Washington and Oregon. I run the guns, and Patty does the goldfish. We save $9,000.
-NOVEMBER . . . We return to Lancaster and are arrested for stealing the credit card.
1995
-OCTOBER . . . We bike from Lancaster down to Charleston, South Carolina. Patty wrecks in North Carolina, and a friend drives us the rest of the way. We live in Charleston for 2 weeks.

1996
-JULY . . . Our first daughter June is born in Lancaster, PA.

1997
-MARCH . . . We sell everything in our apartment, and hike out of Lancaster with backpacks and our 9 month old daughter. We reach the Susquehanna River.
-APRIL - JUNE . . . We get a canoe and paddle 500 miles up the Susquehanna River to its source. We camp on islands. We get a ride to the Erie Barge Canal and paddle west.
-JULY . . . We are arrested in Little Falls, NY. Our daughter is taken, we're charged with neglect, and we fight the courts for months. We are cleared of all charges, but never get her back.
-SEPTEMBER . . . We take a bus out to Ruidoso, NM and camp in woods just out of town. We return to Lancaster and camp in the Brickyard for the rest of the month.
-OCTOBER - FEBRUARY . . . We live in an apartment in the Amish community of Strasburg, PA. Amish go by in their horse and buggies every day.

1998
-FEBRUARY . . . Our second daughter Rachael is born. We try to deliver her on our own at home and fail. Patty ends up in the hospital with a c-section.
-MARCH . . . We get a ride from a friend down to Covington, Virginia. We stay a week, and look for places to camp in the surrounding national forest. We find nothing, and go to New Mexico.
-MARCH - MAY . . . We camp in the Gila National Forest, north of Pinos Altos, a mile from the nearest trail. We camp above a spring with an infinite view west. We start building a hogan.
-JUNE - SEPTEMBER . . . We live downtown in Santa Fe, NM. Patty markets her paintings, and I get a N.Y. literary agent for my first book 'Flesh Aflame'.
-OCTOBER - DECEMBER . . . We rent a house in Crescent City, California, on the Northwest Coast, a mile from the ocean, on the edge of a bird sanctuary. It's great until the rains begin and we run out of money.

1999
-JANUARY - FEBRUARY . . . We camp in the Uwharrie mountains of central North Carolina, and look for a place to build a winter home.
-MARCH . . . We get a canoe and paddle the Holston River down towards Knoxville, Tennessee.
-APRIL . . . We get dropped off in the Smokies and paddle Fontana Lake. We stash our canoe at Chambers Creek and hike in to the Smokies for a secret camp. Patty paints the creek, and we stay 3 weeks.
-MAY . . . We live in a trailer just off the ocean in Myrtle Beach, SC. The sky is beautiful after storms and we love the pelicans.
-JUNE . . . We camp in the Brickyard back in Lancaster, PA, saving money for an apartment.
-JULY - DECEMBER . . . We live in Lancaster and save for our trip back out to New Mexico. We also buy the jeep.

2000
-JANUARY - JUNE . . . We camp and travel all over the Southwest, from the Gila, to Organ Pipe, to the Weminuche in Colorado. Brooke is born in February in a motel in Deming, NM.
-JULY . . . We stay in condos with a friend in Aspen, Colorado. I do concrete work. We then go to California, and look for a place to live in the Russian River area.
-AUGUST - OCTOBER . . . We rent a small house in Tesuque, NM, just outside of Santa Fe. We hike up into the Pecos Wilderness. We become vegetarians.
-NOVEMBER . . . We visit a friend in Tucson, AZ, then drive to Crescent City and the Northwest Coast. The beautiful weather is over, and the rains have begun. We don't stay long.
-DECEMBER . . . We return to Pennsylvania, and live out of our car in the Philidelphia area while Patty works at a restaurant. We sleep in parking lots and rest stops. It's the coldest December on record for the area, with the wind chill it's -10.


2001
-
JANUARY . . . We head south for warmth, try the Chatooga area of South Carolina, then camp in the woods of northern Florida.
-
FEBRUARY - JUNE . . . We live in Asheville, NC, in the middle of the Southern Appalachains. We spend nearly every day out on the trails, hiking, and learning plants.
-
JULY . . . We get mountain bikes for touring, and bike the Blue Ridge Parkway to the Smokies.
-
AUGUST . . . We camp in the Weminuche Wilderness of southwest Colorado, and do a 6 day fast.
-
SEPTEMBER . . . We stay in Loveland, Colorado with a friend. We climb Long's Peak on the day after 9/11. We then drive to Vermont, and look for a place to live in the Burlington area.
-
OCTOBER - DECEMBER . . . We rent a house in Tucson, AZ, and try to become raw fooders.

2002
-
JANUARY . . . We hike in to Jordan Hot Springs in the Gila.
-
FEBRUARY . . . We bike in to Turkey Creek Hot Springs. We stash our bikes near the mouth of the creek, and hike the rest of the way. Many of the pools have been ruined from floods.
-
MARCH . . . We go to Vermont again, this time the Bennington area of southern Vermont. It's way too cold.
-
APRIL - JULY . . . We rent a house in Asheville, NC again. This time we have a large garden, and become 100% raw fooders. Every day I'm out hiking the trails gathering wild edible plants.
-
AUGUST . . . We cash out all our credit cards, and move up to Shining Rocks Wilderness in the Southern Appalachians, camping at over 5,000 feet. There are blueberry fields everywhere, and blackberry, and wild cherries. Not only are we mono-raw fooders now, much of our food is wild. I hike barefoot everywhere. We bathe in the pool below the falls.
-SEPTEMBER . . . We visit a friend in Atlanta, and on a night full of alcohol I break my foot in 3 places. I'm told I'll be crippled with arthritis, and ultimately never walk again.
-OCTOBER - DECEMBER . . . We rent a furnished condo in Tucson, AZ. I cut my cast off prematurely with tin snips.

2003
-JANUARY . . . We camp off the Gila River at Box Canyon, just up from the city of Gila. I'm still on crutches. We meet Jabber-Mike, and Vet-Mike, and Doug. We trade juniper berries for Doug's black walnuts. We're still 100% raw fooders, and Doug teaches me the local plants.
-FEBRUARY - MARCH . . . We return to Atlanta for free medical care so I can learn how to walk again. PT is hell.
-APRIL - MAY . . . We go back to the Gila and camp off the Gila River. We gather cattail, nettle, primrose flowers, and harvest prickly pear pads. We find the most perfect hot spring in all of the Gila, man-made, at Brock Canyon.
-JUNE . . . We fall off our raw food diet, and camp up at Black Balsam again off the Shining Rock Wilderness. We gather wild strawberries. We then camp above the Amicalola Falls in north Georgia for 2 weeks. We become committed to the idea of buying land.
-JULY - SEPTEMBER . . . We live in Woodstock, GA, just north of Atlanta. I do a 14 day water fast.
-OCTOBER . . . We paddle Fontana Lake in the Smokies, on our way to Nova Scotia. We find a great camp and gather wild persimmons, but ultimately abandon the trip.
-NOVEMBER . . . We go back to camping off the Gila River at Brock Canyon. I begin 'June'. We run totally out of money, and gather and clean 10lbs of desert willow seed to sell to a local guy in Gila. He gives us $20/lb, and we use the money to get back to Georgia.

2004
-JANUARY . . . We go to north Florida, and check out the sinks, and the aquifer springs, and paddle the Wacissa River.
-FEBRUARY . . . We paddle the Suwanee River in North Florida. Patty makes a basket out of greenbriar.
-MARCH . . . We camp in the pine flats of Apalachicola National Forest. We make baskets from grapevine, cordage from the retting of Spanish Moss, and a mat from palmetto. We camp here for 3 weeks with no money while we wait for our tax refund. We're 100% raw fooders again.
-APRIL . . . We camp off Owl Creek and paddle the river. There are free hot showers in a nearby campground. There's a great trail with wild blueberry, and we gather the new shoots of bracken. We later camp in Tate's Hell.
-MAY . . . We camp at Sand Creek in the Ocala National Forest, an hour east of Atlanta. I gather cattail in the Beaver Pond. I edit and type up the 'June' book at a nearby library for a literary agent.
-JUNE . . . We drive out to Oregon and camp off the Illinois River in the Siskiyous.
-JULY . . . We camp in the Adirondacks off Jones Pond.
-AUGUST . . . We camp in the Jemez Region of northern New Mexico. We gather wild mushrooms, and sell lobster mushrooms to chefs in Sante Fe. We camp at San Antonio Hot Springs for a week, and Big Tesuque Campground outside Sante Fe.
-SEPTEMBER . . . We go back to the Gila and camp at Brock Canyon. We gather desert willow seed again. We swim and play games in the river. We see tarantulas. I gather prickly pear fruit in baskets we've made from willow. We take a trip up to Turkey Creek Hot Springs.
-OCTOBER . . . We camp in the Oconee National Forest southeast of Atlanta, under persimmon trees in a field. We also camp up on Pigeon Mountain near Rocktown.
-NOVEMBER - JANUARY . . . We live in Atlanta.

2005
-FEBRUARY - MARCH . . . We move to Portland Oregon. We paddle the Wilamette River, and go to the nude beach at Sauvie Island, just after Mt. St. Helens erupted.
-APRIL . . . We return to north Florida looking for land to buy. Everywhere is flooded, and there's been a lot of damage from the previous hurricane.
-MAY . . . We camp up on Pigeon Mtn. The weather's perfect, and there's more wild food here than anywhere else.
-JUNE . . . We go to Arizona, and camp in the Hannigan area of Apache National Forest. We ultimately try to get back out to Oregon, but car problems make it not possible.
-JULY . . . We return to Pigeon Mtn in Georgia. The blackberries are in.
-AUGUST . . . We stay in a campground off the ocean in Jacksonville, Florida, while we look for jobs and a place to live.
-
SEPTEMBER . . . We move back to Atlanta.
-
OCTOBER . . . We abandon the jeep with 320,000 miles in a motel parking lot.

2006
-MARCH . . . the girls and I camp up at Pigeon Mtn, in a secret camp we've made.
-JUNE . . . the girls and I go back to Pigeon and camp longer, this time starting a wigwam from red maple saplings, muscadine vines, and grass I collect naked in the field with a small knife.
-AUGUST . . . the girls and I camp up at Graveyard Fields off the Blue Ridge Parkway. Every day we gather the wild blueberries and swim in the pool beneath the falls. We hike all the trails, and establish a secret camp in a grove of juneberries.


2007
-FEBRUARY . . . We look at property in north Florida.
-MARCH . . . We look at property in Asheville, NC.
-JUNE . . . We look at the 10 acres in Sunbright, and make an offer.
-AUGUST . . . We close on the Sunbright property, and take the kids to Disneyworld.
-OCTOBER . . . The girls and I camp up on the property in Sunbright, and clean up the trash from the fire. I build a fireplace out of old concrete blocks.

2008
-APRIL - SEPTEMBER . . . The girls and I camp up on the property. We clean out the rest of the trash, build a compost bin for humanure, plant the garden, and fruit trees, I dig the swales, do the stone foundation for the barn, and the stem wall, and the post and beam frame. We build a pad for the gazebo.

2009
-APRIL - JULY . . . The girls and I camp up on the property again. We build the 2 story cabin from scratch, plant another garden, and more fruiting trees and shrubs.
-OCTOBER . . . I put the upper story floor in the barn.
-NOVEMBER . . . The girls and I begin building the barn roof.